Description of the problem: After a year of operation, the effect of wedging the mixer shaft (only one!) Appeared, which I did not pay much attention to. Just started turning before use. But recently the shaft "jammed" tightly. The preliminary reason is sugar. Probably, the wedge is the consequences of caramelization (sugar "grabbed" with iron like epoxy). I decided to disassemble and make fault detection. And immediately - had two more problems.
1) The shaft is jammed, next to which the spring clip "dangled" (the plate fixed with a screw, see in the figure). This can be seen and influenced the flow of syrup under the gland. I began to tighten the screw with a Phillips screwdriver, tore off the slots, and the screw was tightly jammed. He twisted it with tongs for an hour. He corrected the thread with a tap and almost cut the bottom with its sharp end. If you repeat the experiment, it is advisable to blunt the end of the tap on the sharpener.
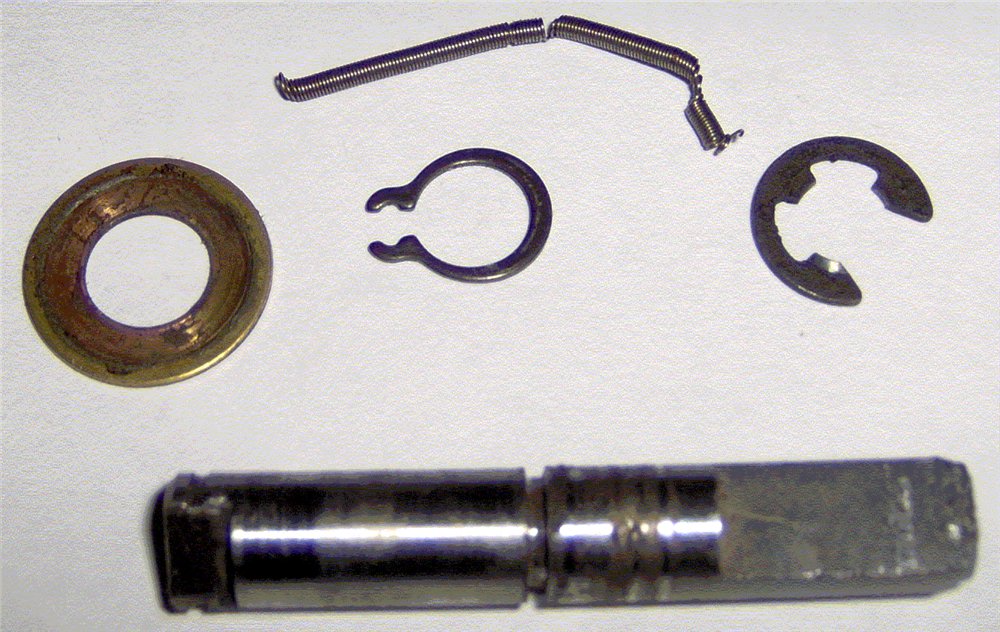
2) Then he began to press out the shaft by light tapping. And then I ran into it: it turns out that under the gland rubber on the shaft there is a spring washer and a spring with a diameter of 1.6 mm in the form of a ring. This spring, in a torn form, I squeezed out through the gum gland, tearing it.
Here is a photo of the stirrer assembly:Shaft and accessories
Half-coupling
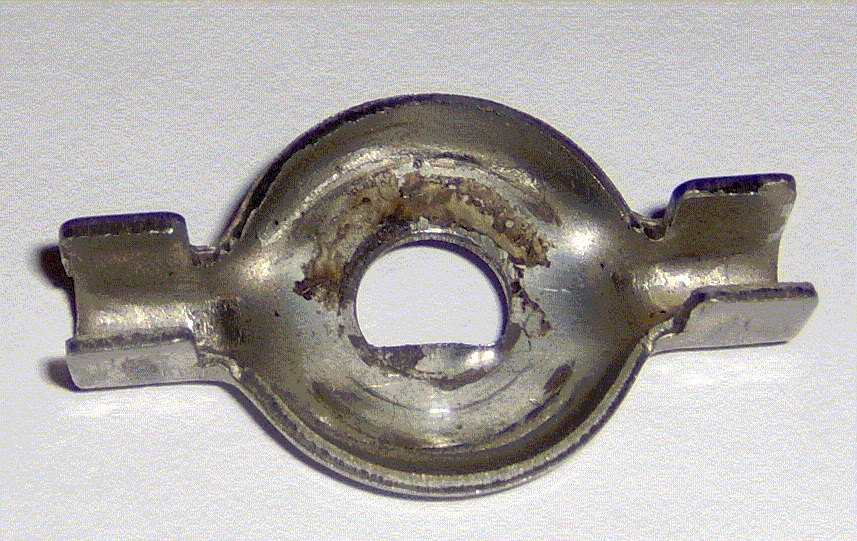
PSh node

Stuffing box
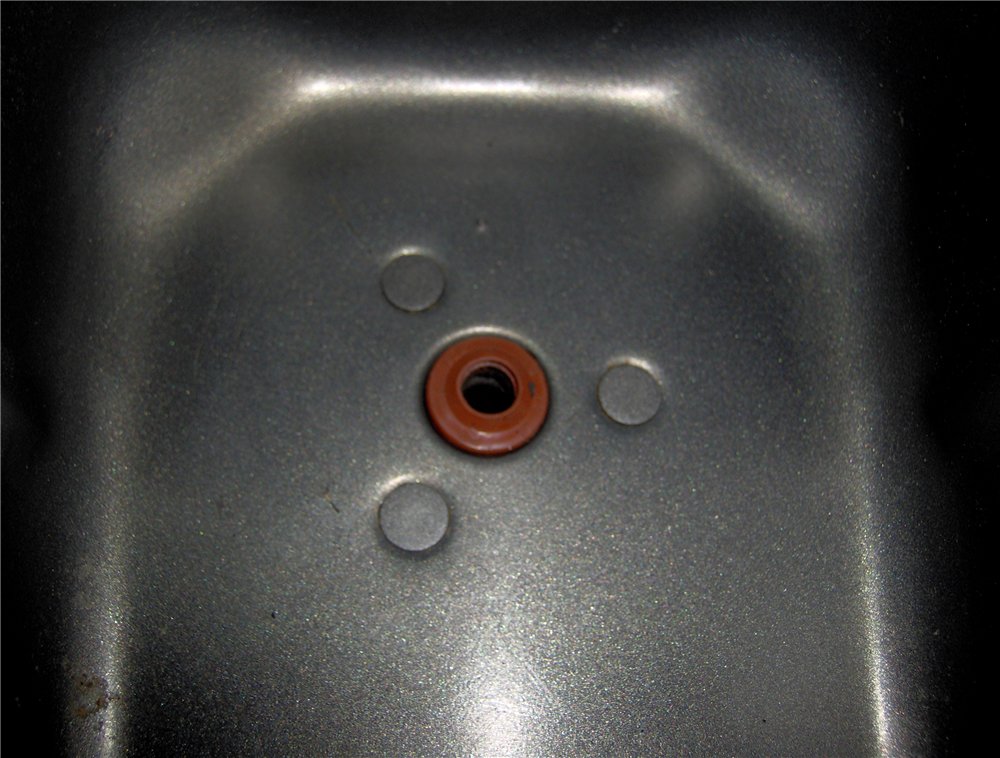
Stirrer unit SB
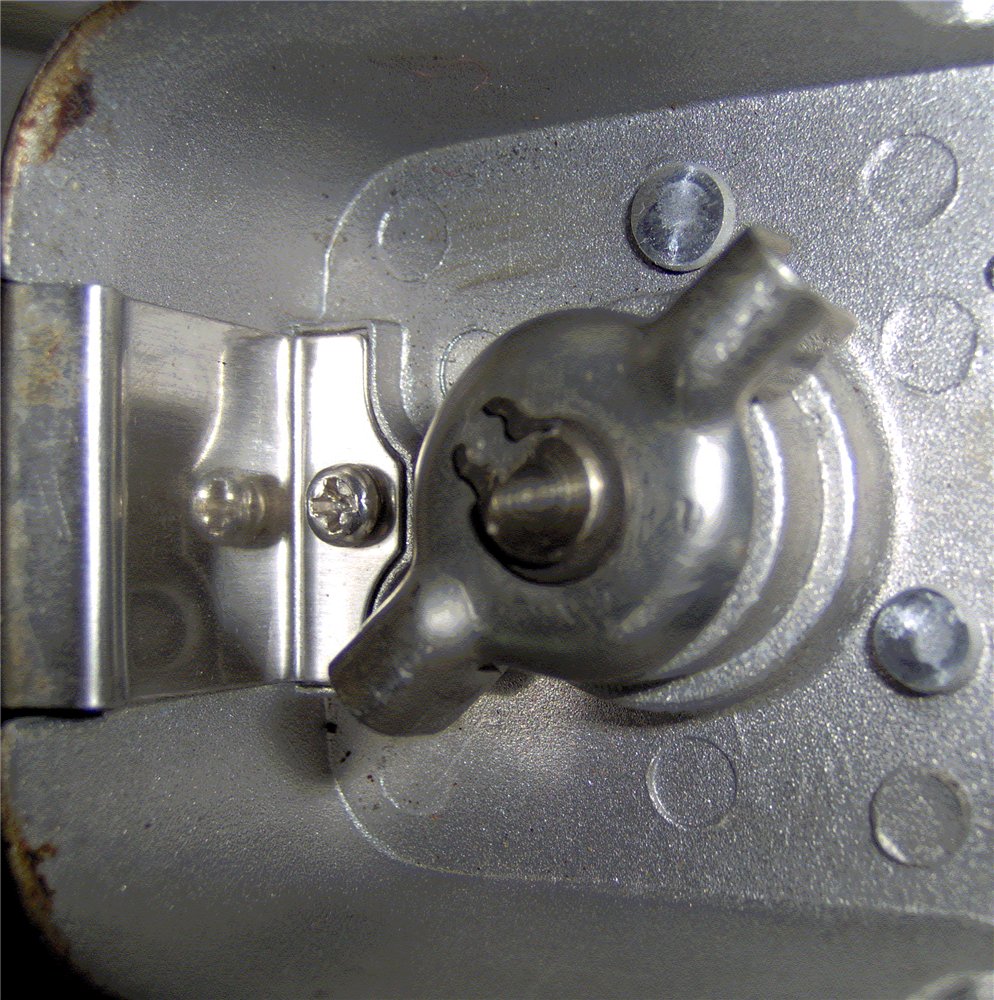
I had no guarantee for the oven. The service does not repair the bucket and does not give advice.
In the reference books - there is no such gland (reinforced cuffs) 8x18x7 version 2 in GOST, but only in DIN (import). I call different rubber companies, that in the nearest access there are other rubber products, but there is no necessary oil seal. Automotive valve stem seals do not fit.
Looking further, I found it. There is a good company, they speak a pure technical language and are willing to help. I grab a bucket and go. Calmly, with fitting, in 15 minutes on a CNC machine for half a million euros, with breakneck speed and precision I grind a seal made of heat-resistant rubber for 160 rubles (120 + 40 per speed). I agree to save the settings on the machine, if someone wants to use this channel, I find out what the guys can send by mail. I go to the store, buy PMS-200 grease (more viscous than PMS-100), grease all the rubbing surfaces of the assembly, collect and bake bread. The only negative is turning - not casting, the surface is rough, sticks a little, I think sunflower oil will help. In this store "CHIP and DIP" (contact - see below) you can order grease by mail. Price -64 rubles.
Photos:This is our oil seal
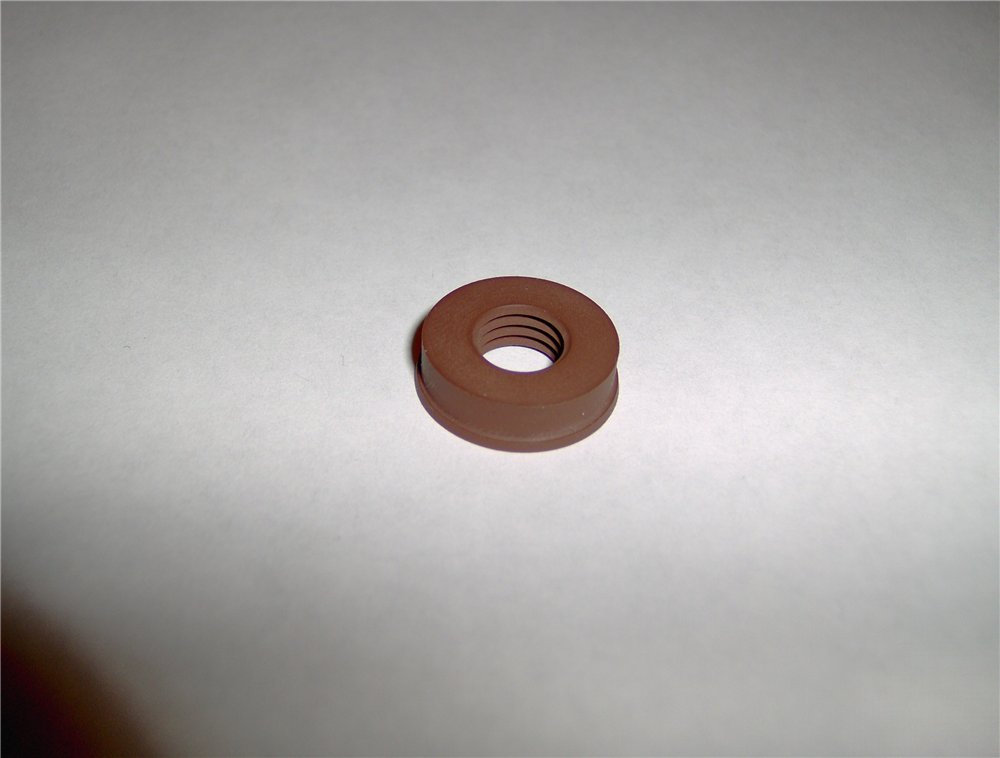
And this is he already in the bucket

Grease
 Now the main thing:
A preliminary analysis of the bucket design showed the following:
1) The bucket cover is strong enough. If you remove the burnt dough only after soaking it a little in warm water and carefully removing the dough by hand, then the bucket will last long enough to survive the wear and tear of the rotating parts.
2) The shaft and the sliding bearing (p / w) are made of raw steel (I doubt that the p / w is made of gray cast iron, and the shaft is cemented). No grinding, as it is not hot. The backlash is large - thermal compensation.
3) The p / w axis is not coaxial to the axis of the gland bore (probably the gap between the bucket edge and the hole in the p / w area). This means that this compensation is due to the elasticity of the gland gland (the spring ring helps to grip).
4) The spring plates-retainers on the cast part of the bucket are poorly fixed and not centered, then there is a misalignment of the agitator shaft and the drive gear shaft. This is noise and increased wear of the couplings.
5) After reading a piece of the article "Diagnostics of Moulinex Bread Makers" about Mulya in P&C No. 9 p. ("The presence of a toothed belt and large-diameter gear wheels in the mechanical part of the drive degrades the dynamic characteristics of the rotating system. Such a kinematic system is more rigid than the traditional ones used by other manufacturers.It has a less smooth running and increased noise during operation. "), I realized that the location of the mixers is also an important point. If they stand under 90 degrees when moving towards, then at the moment the dough is cut off (when the mixers meet) there will be an impact and microdeformation of the friction pair ...
6) Inspection of the removed shaft (see photo) showed that sticking of caramelized sugar also occurs in the gland area. We have a rotating cam, where through the zones of non-adhesion of the oil seal and the shaft, the syrup goes with a whistle into the hotter zone of p / w. After cooling down - a wedge.
Conclusions:1) Don't panic!
2) We buy PMS-200 by mail and lubricate the sliding pair before work.
3) Who has a lot of wear - as soon as the bread was taken out - turn the shaft with a stirrer or from below for the coupling. Should help avoid a wedge, especially since the bucket cools down quickly. Please take precautions. The bucket is hot! When the temperature drops (you can touch the bucket), the problem bucket without lubrication can be soaked whole and then, taking warm water, let it work in the kneading mode to dissolve the adhering layer on the shaft and in the gland area. Just don't dip the hot bucket. Spoil the coating.
4) About the lubrication. If PMS isn't available, try Weldtite Teflon Spray (for bikes). It has a great penetrating power, only until it evaporates, it smells harsh.
5) check the fastening of the plates mentioned above. Without fixing, there will be increased wear.
Links:------------------------------
Polymethylsiloxane fluids
Silicone oil PMS-200 (PET bottle with spout), 20 ml.
Silicone oil (silicone liquid) PMS-200 GOST 13032-77 (CAS No. 63148-62-9)
Designed for lubrication of lightly loaded parts in friction and rolling units in appliances, household and office equipment. In car care products - for lubricating rubber seals, hydrophobic treatment of high-voltage wires and parts.
Absolute inertia. Separating liquid.
Water repellent.
Appearance: Transparent liquid
Viscosity (in centistokes): 200 cSt
Working temperature: -50 to + 2000C
Volume: 20 ml.
Packing: PET bottle
Packing: 10 pcs. in heat shrink
www .chip-dip. ru / catalog / show / 2198.aspx Why PMS-100?
Because it is approved for use in the food industry, for example
www. lakmar.com. ua / catalog / use / 9 /
-------------------------------------------------------------------------
Oil seal manufacturingSPb, firm "ROST"
www. rost-holding. ru / about / our R04 profile
www. rost-holding. ru / manufacture / 46 / manufacture92.html Manager - Pavel (first with him)
Machine operator - Ivan
The sources are on their machine computer
Moulinex \ 5002
two files
bwr04 + r04.PDF
r04 + bwr04.PDF
---------------------------------------------
PSAn untested option for the Samodelkins. I kept it in reserve. Idea (untested) - for the case when it is urgently necessary to do, but there is no place to take spare parts (manufacturing "on the knee").
Therefore, additions are more appropriate here, but for criticism.
Here we need an EMPTY 16 gauge metal case (accidentally found or donated by a hunter for this occasion, not purchased for storage or other illegal purposes).
Value: thin, strong, suitable bore, base (primer hole) for drilling a center hole.
----------------------
So:
We drill the capsule under the existing long screw and with a file make teeth 0.5-1.0 mm high. Geometry - like a hacksaw blade.
An extreme case is to make notches-teeth with a knife. Do not squeeze the sleeve too much so as not to deform. Insert the flat head screw + washer from the inside, washer + nut from the outside. We are tightening. We get an end mill.
Next, you need a fluoroplastic (aka Teflon). The ideal case is a plate or a sheet. Then we insert our screw into the collet chuck of the drill, and cut it at low speeds. Don't forget about safety precautions.
We release the nut, remove the screw from the collet chuck, push out the cut cylinder and the screw from the sleeve. Again we insert the cylinder into the sleeve until it stops and drill it with the same drill that we used for the primer. Before drilling, we expose the drill to the chuck, so that it goes to the depth of the chuck body + cylinder height - 2 mm. From below we support the cylinder with something when drilling. Next, we push the future oil seal out of the sleeve with the drill shank and drill the hole in the usual way. We have a workpiece with a centered hole.
Further, depending on the obtained height -2 options. We need a height of about 7 mm.If we have a close one, we grind it on a skin or file (put it on a file and grind it). A high column - we put it through the washers on the screw, the screw - into the drill and, like on a lathe, we cut it off with a hacksaw blade for metal. Technology - rotation of the chuck "away from you", either someone holds the drill, or we clamp it, for example, on a board, using the additional handle of the drilling depth limiter.
In the same way, we adjust the diameter and make chamfers using either a small file or a sandpaper wound on a ruler.
The final operation - carefully re-drill the 7.9 mm hole with a new sharp drill.
Fluoroplastic is a plastic material with permanent deformation, so a worn out hole can be restored with a press (bolt, 2 washers and a nut).
------------------------------------
Just in case of fire (TB):
1) when cutting off a knife. the blade should pull away from you, observe the perpendicularity of the cut;
2) do not hold the canvas with your bare hand, wind it;
3) you need to ream from both sides, especially fluoroplastic (so as not to undermine);
4) take your time, or rather choose the outer diameter
-------------------------------
If there is a plate of suitable thickness, then you can:
a) use a "ballerina" or compasses
b) drill, cut with a knife to a polygon and grind (difficulty - you need to hold the file firmly to remove the beats)
--------------------------------------
Such "handicraft" can work long enough to your delight.
-------------------------------------------------------
Addition to the above.
Do not sin on the oil seal if the shaft has an ovality of 0.1 mm or more, or it is offset from the axis of the hole by more than 0.08 mm: cuff leak is inevitable. It will not be eliminated either by polishing the shaft, or by strengthening the pressing of the working edge by additional spring preload (by shortening the turns). Change the hardware!
The culprit for a "bad" seal can be: an annular groove on the shaft (the result of natural wear of the metal) or the restriction of the mobility of the lip of the cuff by the end of the bore. In both cases, move the packing lip along the shaft axis
Read,
uraldnepr. ru / publ / 1-1-0-15, correct article. This confirms once again that with our alternating load, the life of the shaft is about 2 years. No oil seal (reinforced cuff), even a new one will not save. Is our
seal partially works by itself as a p / w and reduces wear on the shaft (relieves the load by changing the shoulder, remember the resistance). Plus PMS between the sealing lips. Therefore, we do not have repairs, but modernization.
Write if you have questions.Good luck! 


