|
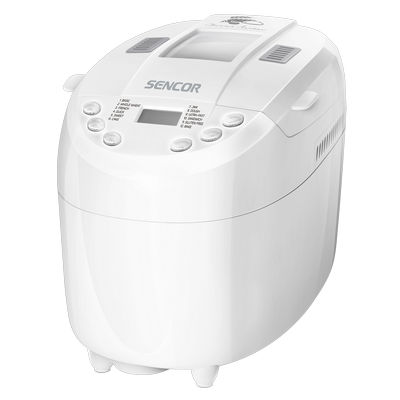
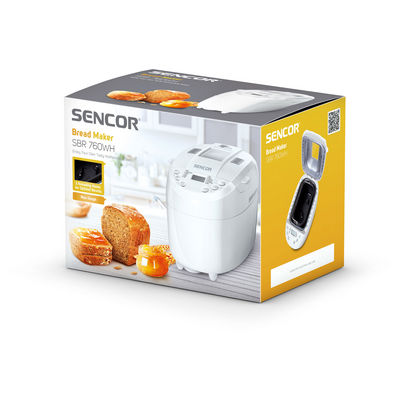
Technical characteristics of the Sencor SBR 760WH bread machine
2 kneading hooks
Timer for 13 hours to bake at the right time
10 standard baking programs
1 standard program for making jam and preserves
1 standard program for baking dough only (e.g. pizza, bagels, donuts etc.)
Maximum bread volume 1 350 g
Large LCD display with backlight
Cover with inspection hole
Memory for 10 minutes in case of email failure food (the bread maker continues to bake further)
3 levels of crust color setting (light / medium dark / dark)
Keeping warm function for 60 minutes after the end of baking
Non-stick coating of mold and kneading hook for easy maintenance
Dishwasher safe
Acoustic signal for adding ingredients that require less baking time
Power consumption 850 W
Non-slip feet
Accessories included: measuring cup, spoon and steel hook to remove the kneading hook
Dimensions (width x depth x height): 247 x 139 x 189 mm
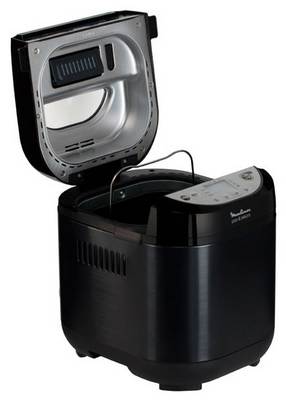
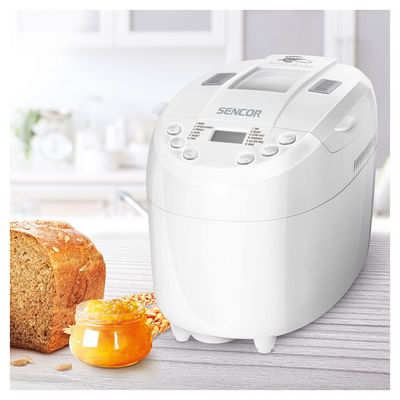
Bread Maker Sencor SBR 760WH
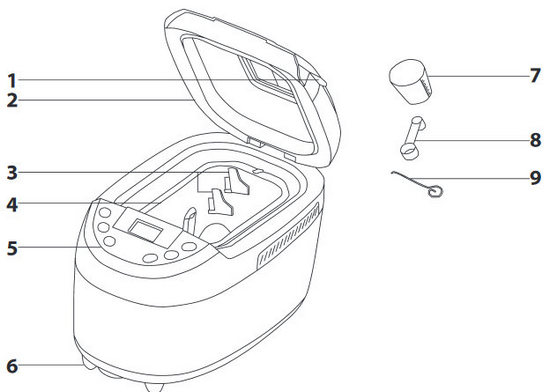
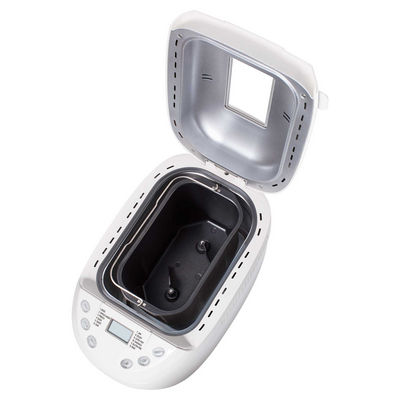
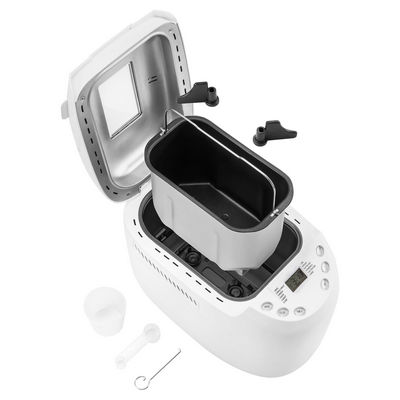
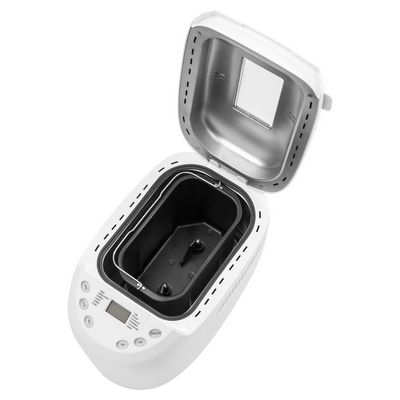
- Cover handle
- Cover with inspection hole
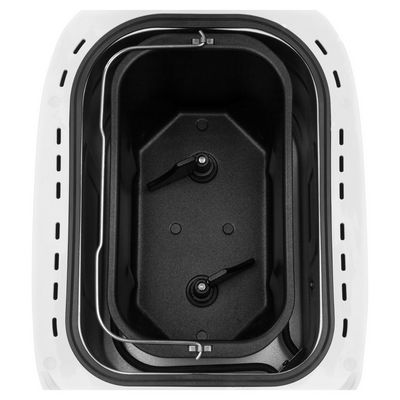
- Kneading hooks
- Baking dish with foldable handle
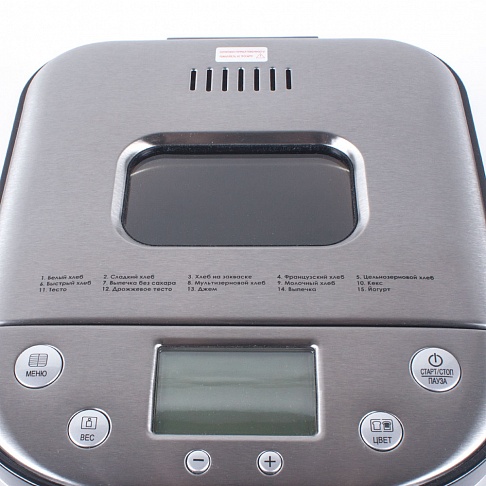
- Control panel with display
- Non-slip feet
- Measuring cup
- Scoop
- Hook for removing kneading hooks
Control panel of the Sencor SBR 760WH bread machine
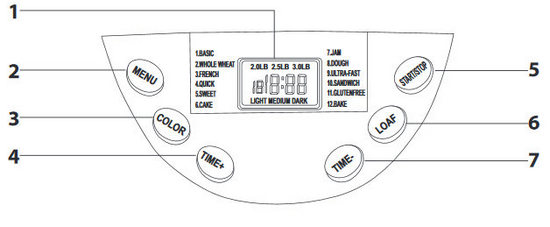
- Display: shows the selected program and its duration, the set crust color and the size of the loaf.
- KHonKa MENU: designed to install programs from 1 to 12.
- KHonKa COLOR: designed to set the color of the crust of the bread.
- T1ME + button: used to set the delayed start timer.
- Button: "START / STOP" is intended for starting, stopping or canceling the set program.
- KHonKa LOAF: Designed to set loaf size 2 lb (900 g), 2.5 lb (1130 g), 3 lb (1360 g)
- TIME button is used to set the delayed start timer.
Before turning on this appliance, please read the instruction manual carefully even if you are already familiar with the use of similar appliances. Use the appliance only as described in this instruction manual. Retain this manual for future reference.
It is recommended that you keep the original box and packaging material, sales receipt and proof of seller's liability or warranty card for at least the legal elimination or warranty period. In case of transport, it is recommended to repack the device in the original box.
Bread maker control and functions
MENU button
■ Designed to select programs from 1 to 12. Each press of button 2 is accompanied by a short beep. The set program and its duration are shown on LCD display 1.
COLOR button
■ Allows you to set the crust color "LIGHT" (light), "MEDIUM" (medium dark) or "DARK" (dark). The set crust color is displayed on the LCD display 1.
■ In program 6 - SAKE, 7 - JAM and 8 - DOUGH, the crust color cannot be selected.
LOAF button
■ Designed to hold a p3 size loaf of 2 lb (900 g), 2.5 lb (1130 g), 3 lb (1360 g). Loaf size refers to the sum of the weight of all the ingredients in the baking dish 4. The selected loaf size is displayed on LCD 1. The program duration differs depending on the selected loaf size as described in the Program List and Duration chapter.
■ In program 6 - SAKE, 7 - JAM, 8 - DOUGH and 12 - WAKE, the loaf size cannot be selected.
T1ME + and TIME- buttons
■ Buttons 4 and 7 are intended for setting the delayed start timer.
■ Do not use this function in recipes that contain perishable ingredients, eg. fresh eggs, milk, sour cream, cheese, etc.
■ Observe the correct order for placing the ingredients in the baking dish 4 as described in the chapter "Using the Bread Maker". The yeast must not come into contact with liquids before starting the program.
Example by setting a timer:
It is now 21:00 and the next day in the morning at 8:00 (i.e. the time is 11:00) you want to receive freshly baked bread... First select a program, crust color and loaf size. After that, use buttons 4 and 7 to set the time shown on display 1 to 11:00. This is the time after which it will be possible to get the bread out of the bread machine. Each press of button 4 or 7 increases or decreases the set time by 10 minutes. To start the set program in delayed start mode, press the "START / STOP" button 5. The display will start counting down again. As soon as the set program has started, check the bread maker regularly.
Note:
The timer can be set to a maximum of 13 hours.
START / STOP button
■ Designed to start, interrupt or end an installed program.
■ Press button 5 one p3 to start the program. A beep will sound briefly, a colon will flash in the time display on LCD 1 and the set program will start. After starting the program, the remaining buttons are deactivated in order to prevent a possible violation of the currently executing stage of the program.
■ The program currently running can be temporarily interrupted at any time by briefly pressing button 5. The countdown to the end of the program is interrupted and the time on display 1 will flash. The settings will be saved in the memory of the bread machine. To restart the set program, press button 5 again. If you do not do this within 10 minutes from the start of the interruption, an automatic start will be performed again.
■ To end the program, press and hold button 5 for approx. 2 seconds. The end of the program is signaled by a long beep.
FUNCTION KEYERWARM
■ At the end of the program, the bread maker will automatically switch to preheat mode (keep warm) for 60 minutes. If you want to take the bread out of the bread maker without reheating, cancel this function by long pressing KHonKH "START / STOP" 5.
■ This function is not available for programs 6-SAKE, 7-JAM and 8-DOUGH.
MEMORY FUNCTION
■ In the event of a short-term e-mail failure. power supply (up to 10 minutes) after the power supply resumes, the bread maker will automatically continue to rotate according to the set program without the need to press KHonKH "START / STOP" 5.
■ In case of longer e-mail failure. (more than 10 minutes), a program that was interrupted will not be resumed automatically. However, if the proving phase has not yet been started, you can restart the program from the beginning. If the lifting phase has already begun, it will be necessary to start over with new ingredients.
Display warnings
- If, after starting the program, display 1 shows the data "H: HH" accompanied by an audible signal, this means that the temperature inside the bread maker is too high. This may occur when you want to reuse the bread maker. Open cover 2 and leave the bread maker to cool in within 10-20 minutes After cooling, the bread maker can be used again.
- If, after starting the program, display 1 shows the data "L: LL" accompanied by a sound signal, it means that the temperature inside the bread maker is too low. Open cover 2 and place the bread maker in a space with room temperature. The recommended room temperature is from 15 ° C to 34 ° C.
- If display 1 shows the data "EEO" or "EE1" - contact an authorized service center.
List of programs and their duration
- - BASIC (main types of bread). This program includes the kneading, raising and baking phases.It is used for baking common types of bread made from white wheat flour, whereby the taste can be enhanced with various ingredients, eg. herbs, etc.
- - WHOLEWHEAT (p3 flour bread). This program includes the kneading, raising and baking phases. Used for baking bread from p3 flour. Note: We do not recommend using the delayed start function in this program. Otherwise, the quality of the bread may deteriorate.
- - FRENCH (French bread). This program includes the phases of kneading, raising and baking, with more rise times than the normal program. Used to bake traditional French white bread with an airy and crispy crust. We recommend using French-style bread on the day it is baked.
- - QUICK (quick baking). This program includes the kneading, raising and baking phases. This is a faster alternative to program # 1 - BASIC. Bread baked in this way has a less porous middle compared to bread baked according to basic program No. 1.
- - SWEET (sweet bread). This program includes the kneading, raising and baking phases. Used for baking sweet bread high in fat and sugar with added dried fruits, nuts, chocolate flakes, orange peels in syrup, etc.
- - SAKE (pie). This program includes the kneading, raising and baking phases. Used for baking pies and sweet pastries made from dough containing p3 baking powder or baking soda.
- - JAM (jam). This program is used to prepare fruit jam and jams. Jam and jams it is necessary to cook in small portions, as their volume increases during cooking. The jam is sticky, and it is very difficult to clean if it flows out of the container.
- - DOUGH (dough)
- - ULTRA-FAST (very fast baking). Kneading, raising and baking bread in the shortest possible time. Typically, this bread is less porous than the one that will be baked with program # 4 - QUICK. The water temperature is very important for this program. In order for the loaf to acquire the required size after lifting, the temperature of the water or other liquid component must be in the range from 48 to 50 ° C.
- - SANDWICH (toast bread). This program includes the kneading, raising and baking phases. Used for baking puffed bread with a firm crust.
- - GLUTEN-FREE (gluten free bread). This program includes the kneading, raising and baking phases. The rise occurs only at one stage, and the baking time is longer due to the high proportion of moisture.
- - WAKE (baking). This program only includes the baking phase and thus transforms your bread machine into a small oven. The baking time can be set from 10 to 60 minutes. It is used for baking ready-made dough from the mag3in or for additional baking of ready-made bread if its crust seems too light for you.
Before first use
- Remove the bread maker and its accessories from the box and remove all packing materials, including advertising stickers and labels. First of all, do not itch to remove the sticker on the bottom of the baking dish 4.
- Wash accessories and removable parts intended for contact with food with warm running water and a neutral kitchen detergent, then rinse them with clean running water and dry thoroughly.
- Insert the baking dish 4 with kneading hooks 3 back into the bread maker in its place. Connect the bread maker to an electrical outlet. network, set the program 12 - WAKE (baking) and turn on the bread maker without ingredients for 10 minutes in this mode. At the end of the program, cancel the heating function, unplug the bread maker from the electrical socket. net and let it cool. Wash mold 4 and hooks 3 more p3 and dry well. Note: When first turned on, a slight smoke may appear. This is 6 completely normal. The bread maker is now ready to use. Note: When first turned on, a slight smoke may appear. This is 6 completely normal.
- The bread maker is now ready to use.
Bread maker application
■ Place the bread maker on a flat, dry and stable surface, such as a kitchen countertop.
■ Open the lid 2 and remove the baking dish 4. Place the kneading hooks 3 on the shafts p3 located on the bottom of the baking dish 4 and press them down well.
Note:
For ease of removing the hooks 3 from the baked bread, we recommend that you use the hooks 3 and the shafts with edible fat, which is intended for heat treatment.
■ Measure the ingredients according to the recipe and place them in baking dish 4 in the following order:
- First place all liquid ingredients such as water, milk, beer, buttermilk, yogurt, eggs, etc.
- Then add all loose ingredients like flour, salt, sugar, herbs, bread spices, sprouted seeds, flakes, seeds, etc. Pour salt in one corner, add sugar in the second corner, and spices in the next corner.
- After that, make a depression in the middle of the flour and place the yeast in it. If using fresh yeast, put the sugar along with it. The yeast or loosener must not come into contact with the liquid until the bread maker is turned on.
- For heavy, dense doughs with a high content of rye flour, we recommend changing the order of adding the ingredients to achieve the best kneading result, i.e. put in the yeast first, then flour and at the end of the liquid. And in this case, the rule is that the yeast should not come into contact with the liquid until the bread machine is turned on.
- For all recipes, this general order of adding ingredients must be followed.
■ The final size of the finished loaf can be affected by the room temperature at which we use the bread maker. The recommended room temperature is 15 ° C to 34 ° C.
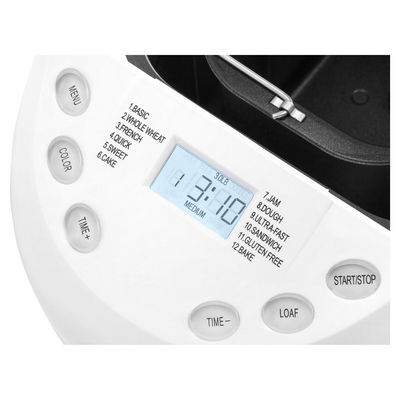
■ Carefully place the baking dish 4 with the ingredients in the bread maker and press it down correctly until it fits firmly into the interior of the bread machine. Close cover 2 and plug the power cord into a power outlet. After connecting to an electrical outlet. a long beep will sound and display 1 will show the initial setting for program 1, program duration 3:10, 3 lb (1,360 g) loaf and crust color “MEDIUM” (medium dark).
Note: IUU If no button is pressed for 20 seconds, display 1 will turn off.
■ Use the "MENU" 2 button to set the required program. Use the "COLOR" ВЗ button to select the crust color and set the loaf volume with the "LOAF" button 6. Some programs do not allow you to set the crust color or the loaf volume.
■ If you want the bread to be baked later, set the delayed start timer with buttons 4 and 7.
■ Press the "START / STOP" 5 button to switch on the bread machine. The colon in the time display on display 1 flashes and the display will count down the time until the end of the program. The bread machine will automatically execute the individual program steps. Steam comes out of the ventilation slots during baking.
■ In programs 1 - BASIC, 2-WHOLEWHEAT, 3 - FRENCH, 4-QUICK, 5 - SWEET, 6 - CAKE, 10 - SANDWICH and 11 - GLUTEN FREE, an audible alarm will sound during the program to warn you about the possibility of adding ingredients. Open lid 2 and add ingredients if necessary. When doing this, be careful not to burn your hands with steam escaping from the ventilation slots and from the baking area.
■ At the end of the program, an audible signal will sound. After that, the bread maker will switch to preheating mode (keeping the temperature) for 60 minutes. If you want to end the heating mode, long press the "START / STOP" button 5.
■ At the end of the program, open the lid 2. Lift the handle of the baking dish 4 and remove the baking dish 4 from the bread machine. Use kitchen gloves for all these operations. Place form 4 on a heat-resistant plate and leave the bread in it for about 10 minutes to cool. Then turn the pan 4 upside down to release the bread from the pan. If the bread does not free itself from the mold, move the shafts several times.Use hook 6 to remove hooks 3 from the bread.
■ At the end of use, unplug the bread maker from the electrical outlet. and clean all used parts according to the instructions in the chapter "Cleaning and care".
Cutting and storing bread
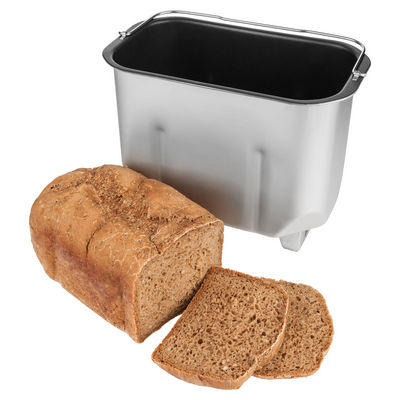
■ Allow the bread to cool for 20-40 minutes before slicing.
■ Use an electric knife or a sharp knife with a serrated blade to cut evenly thick slices.
■ Pack unused bread in a plastic bag. It can be stored at room temperature for up to 3 days.
■ If bread needs to be stored for a long time (up to 1 month), place it in a bag or in a closed container in the freezer.
■ Homemade bread does not contain preservatives and therefore cannot be stored for as long as some store bought breads.
Cleaning and care
■ Disconnect the appliance from the power outlet before cleaning. network and let it cool.
■ If it is difficult to remove the kneading hooks 3 from the shaft, fill the mold 4 with warm water and leave it for 30 minutes. Then remove the hooks 3, carefully clean them with a damp cloth and wipe dry well.
■ Clean the baking dish 4 inside and out with a damp cloth. To prevent damage to the non-stick layer, do not use sharp objects or abrasive cleaners. Baking dish 4 must be completely dry before placing in the bread maker.
Advice:
After cleaning, apply cooking fat to the kneading hooks 3 including the holes in the middle for cooking.
■ Clean cover 2 inside and out with a damp cloth. Then wipe everything dry.
A Warning:
Brown spots may appear on the inside of cover 2 and on the ventilation holes. These are the residues of the vapors of the ingredients that got into the escaping steam during baking. They have no harmful effect on the material of the bread machine or the quality of the baked bread. Simply remove these stains with a damp cloth.
The outer layer of the baking dish 4 may change color after long-term use. However, this has absolutely no effect on the functionality of the bread maker or the quality of the bread.
■ Do not immerse the bread maker in water or other liquids.
■ Before storing the bread maker, make sure it is cool, clean, dry and that the lid is closed 2.
Baking bread
A brief description of common ingredients used to bake bread
1) Bread flour
Bread flour contains a high proportion of gluten (therefore it can also be called flour with a high content of gluten, which contains a lot of proteins), it has good elastic properties and is able to maintain the size of the bread after the dough is raised. Since it contains more gluten than regular flour, it can be used to bake large breads. Bread flour is the most important ingredient in bread baking.
2) Plain flour
Regular flour is made by mixing carefully selected soft and durum wheat and is recommended for quick bread or cake baking.
3) Whole grain (wallpaper) flour
Whole grain flour is made by grinding wheat and contains wheat skins and gluten. Whole wheat flour is heavier and more nutritious than normal flour. Bread made from whole grain flour is usually smaller. Therefore, many recipes usually combine whole grain and bread flour to achieve the best results.
4) Rye flour
Rye flour is primarily intended for baking dark bread. It contains a large proportion of minerals. It has less gluten than wheat flour and is therefore usually used in combination with wheat flour.
5) corn flour and oat flour
Cornmeal and oatmeal are made by grinding corn and oats. Both are an additional ingredient in bread baking and are used to enhance the flavor and texture of the bread.
6) Sugar
Sugar is a very important ingredient for the sweet taste and color of bread.White sugar helps in the fermentation process.
7) Yeast
Yeast activates the dough fermentation process and produces carbon dioxide, which helps to increase the volume of the bread and make the inner fibers softer.
1 tea spoon of active dry yeast = 3/4 teaspoon soluble yeast
1.5 teaspoon spoons of active dry yeast = 1 tsp. a spoonful of instant yeast
2 tea. spoons of active dry yeast = 1.5 tsp. soluble yeast
Yeast should be stored in the refrigerator, as it loses its properties at high temperatures; check their shelf life and use before use. Place them in the refrigerator as soon as possible after each use.
Advice:
The following procedure will help you determine how fresh and active the yeast is:
1. Pour 1/2 cup of warm water (45-50 ° C) into a measuring cup.
2. Add 1 teaspoon of white sugar and stir, then cover with 2 teaspoons of yeast.
3. Place the measuring cup in a warm place for about 10 minutes. Do not stir the mixture.
4. The foam should rise to the very edge of the measuring cup. If this is not the case, the yeast is no longer active.
8) Salt
Salt is essential to improve the smell of bread and the color of the crust. Salt also helps the dough rise.
9) Eggs
Eggs can improve the structure of the bread, make the bread more nutritious, increase its volume and give the bread the specific flavor of eggs. If you want to use eggs, you need to remove the shells and stir them evenly.
10) Fat, butter and vegetable oil
Fat can soften bread and extend its shelf life. The butter, after removing it from the refrigerator and before use, should be melted or cut into small pieces for even mixing.
11) baking powder
The baking powder is used primarily for raising the dough when baking bread and cakes with the Ultra Fast program. It does not need time to ferment and creates a gas that forms bubbles and makes the structure of the bread finer.
12) Soda
Acts in the same way as baking powder. It can also be used in combination with baking powder.
13) Water and other liquids
When baking bread, water is an essential ingredient. Usually, water with a temperature of 20-25 ° C is best. However, for lifting with accelerated programs, the water temperature must be between 48-50 ° C. The water can be replaced with fresh milk or water mixed with 2% milk powder, which can improve the flavor of the bread and form a better crust color.
■ Different flours look the same, the effect of yeast or the absorption of different flours differs significantly depending on the growing area, growing conditions, grinding and storage processes. For the test, select different brands of flour available on the market, test it and compare the results - then select the flour that, based on your experience and in terms of taste, provides the best results.
Recommended recipes
■ The ratios of weight, volume and content of individual ingredients in all recipes below are indicative only. The baking result depends on many factors:
- water hardness (when using too soft water, the dough rises faster)
- air humidity (in case of high humidity, it is necessary to reduce the amount of water by 1-2 tablespoons)
- altitude at sea level (above 750 m, the dough rises faster)
- consistency of ingredients
■ For the above reasons, we recommend that you adapt the recipe you have chosen to the current conditions, if necessary.
■ The standard set of the bread maker includes a measuring spoon 8 and a measuring cup 7. At both ends of the measuring spoon 8 there are measures (large and small). The volume of the small measure is 5 ml. The volume of the large measure is 15 ml. The volume of the measuring cup 7 is 250 ml.
■ One measuring cup without top 7 corresponds to 150 g flour or 250 ml water.
■ One small scale without top equals 6 g salt, 3.5 g dry yeast, 4.5 g flour improver, 3.5 g tartar or 6 g baking soda.
■ One measurement without top corresponds to 14 g of sugar, 7 g of raisins, 6 g of nuts, 6.5 g of milk powder, 16 g of vegetable oil. One whole egg weighs approximately 50 to 60 grams.
■ When measuring ingredients, place the measure on a flat surface. Check the exact volume of liquid when the measurement is at eye level.
Advice:
If for any reason you do not want to bake bread according to recipes, you can buy ready-made bread mixtures in grocery stores. In the case of ready-mixed bakery products, always follow exactly the instructions on the product packaging. Also, please note that yeast may need to be added as a separate ingredient to such commercial ready-made mixes.
Basic recipe for bread
340 ml water
1 small measure of salt
3 large scoops of white sugar
2 small scoops of vegetable oil
3 3/4 measuring cups of bread flour
2 1/2 large scoops of low fat milk powder
2 small scoops of flour improver
1 3/4 small scoops dry yeast
Setting the parameters of the bread machine: Program 1 - BASIC (main baking), loaf size: 900 g, crust: choose to taste
Single flour bread
340 ml water
1 small measure of salt
2 1/2 large scoops of white sugar
1 1/2 large scoops of vegetable oil
1 3/4 measuring cups wholemeal flour
2 measuring cups of bread flour
2 large scoops of low fat milk powder
2 small scoops of flour improver
1 1/4 small scoops dry yeast
Setting the parameters of the bread machine: Program 2 - WHOLEWHEAT (one-time flour bread), loaf size: 900 g, crust: choose to taste.
French bread
340 ml water
1 1/2 small scoops of salt
2 1/2 large scoops of white sugar
1 1/4 large scoops of vegetable oil
3 3/4 measuring cups of bread flour
2 1/2 large scoops of low fat milk powder
2 small scoops of flour improver
1 '/ 4 small scoops of dry yeast
Setting the parameters of the bread machine: Program 3 - FRENCH (French bread), loaf size: 900 g, crust: choose to taste
Sweet bread
240 ml water
2 eggs
1/2 measuring cup white sugar
1/2 small measure of salt
1 1/2 large scoops of vegetable oil
3 measuring cups of bread flour
2 1/2 large scoops of low fat milk powder
2 small scoops of flour improver
1 small scoop of dry yeast
Setting the parameters of the bread machine: Program 5 - SWEET (sweet bread), loaf size: 900 g, crust: choose to taste
Pie
4 eggs
80 ml milk
1 large scoop, melted butter
1/2 small measure of salt
2 1/2 large measurements cane sugar
3 3/4 measuring cups flour
1 1/2 small measure of tartar (potassium tartrate)
1/2 small measure baking soda
2 large scoops of dry yeast
Note:
Beat the eggs separately first, and only then add them with the rest of the ingredients to the baking dish.
Setting the parameters of the bread machine: Program b - SAKE (cake)
|


