Endever SkyLine MB-61. Description and characteristics of the bread maker |
|
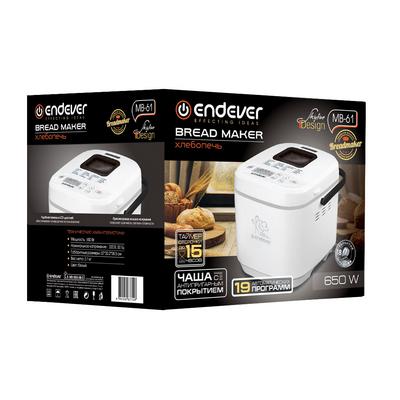
Technical characteristics of the Endever SkyLine MB-61 bread machinePower (W): 650 Rated voltage (V): 220 V, 50 Hz Dimensions: 37 * 30.2 * 28.5 White colour Features and additional functions: 19 cooking programs:Classical French Wholegrain Borodinsky Quick Baking Gluten free Bread with additives Dessert Mixing Yeast-free dough Yeast dough Cake Jam Yogurt Baking Extinguishing Defrosting Roasting Timer for 15 hours Auto preheat: 60 minutes Pause function Saving the current program settings - 10 minutes LCD display Non-stick bowl Baking weight - 500 gr / 750 gr / 1000 gr Contents of delivery:Bread maker Non-stick baking dish Beaker Scoop Kneading paddle Blade extraction hook Manual Warranty card
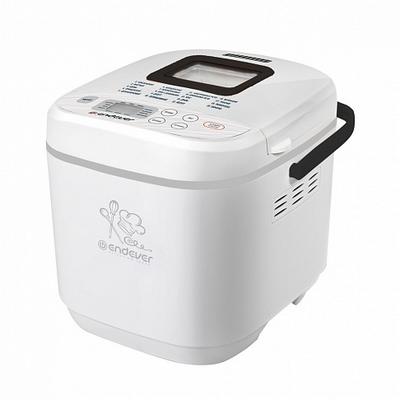
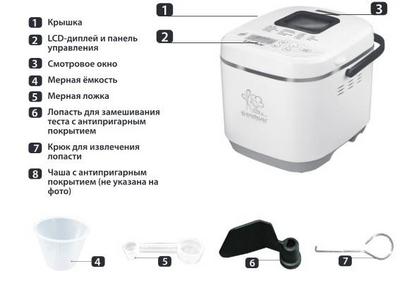
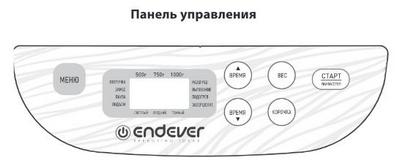
Breadmaker device Endever SkyLine MB-61
MENU KEY By pressing this key in turn, you can select one of 19 offered programs. The program number will be shown on the display. WEIGHT KEY Selection of the baking weight (indicators on the display: 500 g / 750 g / 1000 g). KEY "▲" and "▼" Used to set the timer. Successive pressing allows you to select the setting step, the numbers on the display will stop changing as soon as the key is released. KEY "SHORT" Choice of crust color (indicators on the display Light / Medium / Dark). By pressing this key alternately, you can select the crust color (light, medium or dark). START / STOP / PAUSE KEY By pressing this button, you can start the cooking process (at the same time a beep will sound), if necessary, stop the cooking process ahead of time by pressing the button for 1 second (until the beep sounds). After that, it will be impossible to continue the cooking process - the bread-maker will return to the initial settings of the program. If after starting the cooking process you hold down the button for more than 1 second, the countdown to the end of the program will stop, the product will go into pause mode. You will be able to add ingredients. Pressing the button again will restart the cooking process. After the end of the cooking process and the sound signal, press and hold the button for 1 second to turn off the product. Measuring cup with notches for changing the volume of liquid and flour portions. A full glass corresponds to approximately 160 g of flour. Measuring spoons are used to dispense ingredients. The hook is used to remove the paddle from the baked goods. Before using for the first timeUnpack the instrument carefully, remove all packing materials and advertising stickers except the serial number sticker. The absence of a serial number on the product will automatically void your warranty service. Wipe the body of the bread maker with a damp cloth. Wash the bread pan and kneading paddle with warm soapy water. Dry the appliance and its parts. Before turning on, make sure that the internal and external parts of the device are not damaged, chipped or other defects. Place the device on a firm, level horizontal surface, away from heat sources, places where water, hot grease and other contaminants may get on the device. During installation, make sure that there are no decorative coverings, electronic devices and other objects nearby that may be affected by high temperatures. Do not place the breadmaker close to the edge of the table or close to walls or other appliances. When placing under hanging furniture, make sure there is enough space to open the lid. During the first start-up, a characteristic odor or light smoke may appear from the combustion of technical lubricants used to preserve the finished product. This is not a manufacturing defect. Operation of the Endever SkyLine MB-61 bread machine1. Open the lid, take out the baking dish, hold it by the handle, turn it slightly, then pull up. When taking out the mold, do not try to swing it inside the device body. Damage to the mold in the future can lead to incorrect operation of the temperature sensor and deterioration of the baking quality. 2. Place the dough paddle on the shaft, aligning the grooves. 3. Weigh the required ingredients according to the selected recipe. Prepare additional ingredients (cheese, ham, fruit, nuts, raisins, etc.) according to the recipe. All ingredients should be at room temperature (25-35 ° C), unless otherwise indicated in the recipe. Place the main ingredients in the bread pan in the sequence shown in the recipe: First place the liquid ingredients (water, milk) and / or eggs in the pan. The water should be at room temperature (about 25-35 ° C), as too high a water temperature will negatively affect the rise of the dough. Add yeast or baking powder last. These ingredients must not come into contact with the liquid, or fermentation will start too early. The result is a tough, hard and coarse bread. The yeast should also not come into contact with the salt. It is recommended that you make a hole in the flour pile and put yeast or baking powder in it. 4. Insert the baking dish carefully into the heating chamber of the bread maker. Close the cover with the viewing window. 5. Connect the breadmaker to the mains. Switch on the device by pressing the “Start / Stop / Pause” button. The appliance beeps and the display shows the program number and timer. 6. Install the program by pressing the "Menu" key in turn (a beep will sound when finished). 7. Set the weight of the baked goods by pressing the "Weight" button one by one (you will hear a beep when finished). 8. Set the crust color by pressing the "Color" button one by one (a beep will sound when finished). 9. If necessary, set the delayed start timer using the "+" and "-" keys (a beep will sound upon completion). The delayed start function allows you to cook the product at the desired time interval up to 15 hours (including cooking time) in 10 minute increments. Do not use this mode if the recipe contains dairy and perishable products (eggs, fresh milk, meat, cheese, etc.). The delayed start function is not available for programs 3,12,14,17-19. The start time of the program will be added to the time of its operation. You will see the obtained result on the display. EXAMPLE: At 10:00 pm you want to bake bread by 8 am, which is 10 hours later The following parameters were selected: program 1, product weight 1 kg, medium crust cooking. Display shows cooking time 3:16. Press and hold the "▲" button until the display shows 10:00. If you "missed" the required time value, press the "▼" button to decrease it. You have set the delayed start time. The baking process will now end in 10 hours, at 8:00. If you want to start the cooking process now, skip this step. 10. Make sure the breadmaker is ready for use (ingredients are loaded, program number selected, bread weight and crust color, delayed start time is set if necessary). Press the “Start / Stop / Pause” button to start the cooking process (a beep will sound, the countdown to the end of the program will begin). 11. After the cooking process is over, the countdown will end, the display will show the digits "0:00", and a beep will sound. 12. Heating. At the end of programs 1-9, after a sound signal, the mode of maintaining the temperature of the finished dish is automatically activated (the display will show the program number and time 0:00).The mode will automatically turn off after 60 minutes, and a beep will sound upon completion. To turn off the auto-heating function, press and hold the Start / Stop / Pause button until you hear a beep. For best results, it is recommended that you remove the finished food from the bread maker immediately after cooking. Not available for programs 10-19. 13. Press the Start / Stop / Pause button to turn off the product. Unplug the appliance from the outlet. 14. Use oven mitts to remove the baking container. Open the lid with the viewing window, remove the baking dish by holding it by the handle and pulling it up with a little force. 15. Turn the baking dish upside down and, shaking slightly, remove the finished bread from the mold, place on a wire rack or dish. Leave to cool for 20 minutes. The design of the bread maker provides that after removing the baked goods from the bowl, the kneading paddle must remain on the shaft inside the mold. If this does not happen and it remains in the bread, remove it using the special hook included in the kit. This is not a malfunction. 16. After the baking dish and the appliance have cooled down, clean them according to the section "Cleaning and maintenance". ATTENTION! After starting the bread maker, flour mixing will begin. The program can automatically set the interval for the first stirring - 2 minutes. After 2 minutes, the pause mode will turn on, then the re-stirring mode will turn on. In the event that some ingredients are not enough (for example, water), a sound signal will sound. After setting the delayed start mode, the indicator starts blinking on the display. When the time is right, the device starts up, the countdown and flour mixing will begin. With program # 5 "Whole grain bread" set, the first stirring will start a few minutes after the start of the program. Since the flour used for this bread is heavier, the program preheats the ingredients for half an hour before kneading the dough and leaves the dough to sit for a longer time. Grain flour loaves are usually smaller and denser. Automatic cooking programs1. CLASSIC programUsed to bake classic white bread. The program includes kneading, proving the dough and baking bread. An audible signal will indicate when additional ingredients have been added. 2. FAST programUsed for quick baking of white bread. Add an additional 1/3 teaspoon of yeast to the white bread dough, based on the weight of 600g baked goods. The program includes heated kneading, proofing and baking. An audible signal will indicate when additional ingredients have been added. 3. SDOBA programProgram for making sweet bread with various additives. The program includes kneading, proofing and baking. An audible signal will indicate when additional ingredients have been added. 4. FRENCH programUsed to bake light French bread with a crispy crust. Provides long-term kneading and proofing of the dough. The program includes kneading, proving the dough and baking bread. 5. WHOLE GRAIN programAs the splinter flour used for this bread is heavier, the program will preheat the ingredients for 5 minutes before kneading the dough and leave the dough to “sit” for a longer time. Grain flour loaves are usually smaller and denser. 6. BORODINSKY programRecommended for making Borodino bread. The program includes kneading, proving the dough and baking bread. 7. GLUTEN-FREE programFor baking gluten-free bread. The program includes heating the ingredients, kneading, proving the dough and baking bread. 8. Program "BREAD WITH ADDITIVES"Recommended for baking bread with various additives.The program includes kneading, proving the dough and baking bread. An audible signal will indicate when additional ingredients have been added. 9. DESSERT programRecommended for preparing various desserts. The functions of automatic heating and delayed start are available, as well as the choice of the color of the product crust. 10. Mixing programProgram for thoroughly mixing flour with various ingredients. Allows you to get a homogeneous dough. 11. THERAPY Dough ProgramProgram for kneading and proving yeast-free dough without further baking. Delay start function is available. 12. Yeast dough programProgram for kneading and proving yeast dough without further baking. Delay start function is available. 13. KEKS programRecommended for baking muffins with various fillings. The program includes quick kneading, proofing and baking. 14. JAM programIt is used for making jams, jams, toppings for baking, waffles and ice cream, ketchup, all kinds of spices, as well as for preparing a number of products for home canning. The cooking time can be adjusted in the range from 10 minutes to 1 hour and 20 minutes with a setting step of 5 minutes. The default cooking time is 40 minutes. Delay start and auto heat functions are not available. 15. YOGURT programProgram for preparing various types of yoghurt. The cooking time can be adjusted in the range from 10 minutes to 12 hours with a setting step of 5 minutes. The default cooking time is 8 hours. Delay start and auto heat functions are not available. 16. BAKING programProgram for baking without pre-kneading and raising the dough. Also used to bake pastries. 17. EXTINGUISHING programRecommended for stewing meat and vegetables. The program starts heating without stirring. 18. DEFROST programProgram for defrosting food. 19. Roasting programThe program includes frying without stirring. Cleaning and maintenanceBefore cleaning the appliance, make sure that it is unplugged and completely cooled down. Always wipe the device and its parts dry before further use. 1. Open the lid and remove the baking dish by pulling the handle upwards. 2. Remove the kneading paddle. If the paddle does not come off the axle, fill the baking dish with warm water and leave for a while. This will soften the sticky dough and the paddle will come off easily. 3. Wash the measuring cup, measuring spoon, baking dish and kneading paddle in hot soapy water and dry. If the inside of the mixing paddle is heavily soiled, put it in hot water for a while and then gently clean it. 4. Clean the inside and body of the instrument with a damp cloth. Use a small amount of detergent if necessary. Remove the detergent completely with water, otherwise it may affect the taste of the baked goods. 5. Make sure all parts are dry before reusing the bread maker or before storing it. ATTENTION! Do not immerse the body of the appliance and the power cord in water or other liquids. Do not use abrasive detergents and sponges with a hard or abrasive coating, as well as solvents (gasoline, acetone, alkalis, etc.) when cleaning the bread maker and its parts. The bread maker and its parts are not dishwasher safe or clean. Using the baking dishThe baking dish and kneading paddle have a non-stick coating to avoid stains and make bread easy to remove. To avoid surface damage, follow the guidelines below: Do not use metal or sharp tools (such as a knife or fork) when removing bread from the container. Before slicing a loaf of bread, make sure there is no kneading paddle inside it. If the paddle is inside, wait until the bread has cooled down, and only then remove the paddle with a special hook. Be careful when handling the kneading paddle as it may be hot. Use a soft sponge when cleaning the baking dish and paddle. Do not use any abrasive substances (such as scouring powders) or hard sponges. Ingredients that are hard, coarse, or coarse (such as wholemeal, sugar, nuts, or seeds) can damage the non-stick coating of the cooking container. When using a lot of ingredients, divide them into small portions. Adhere to the recommended amounts and procedure indicated in the recipes. Storing the bread makerStore the assembled instrument in a dry, ventilated place. Protect it from significant temperature changes and prolonged exposure to direct sunlight.
|
| Endever SkyLine MB-54. Bread maker characteristics | Endever SkyLine MB-62. Bread maker characteristics |
|---|
New recipes