|
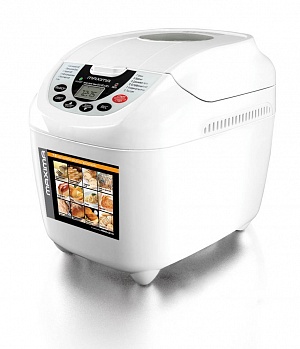
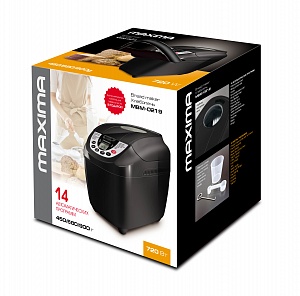
Technical characteristics of the MAXIMA MBM-0219 bread maker
Power: 720 W
Voltage: 220-240V
Baking weight: 450/680/900 g
Baking dish coating: non-stick
Number of automatic programs: 14
Non-volatile memory: up to 30 minutes
Removable cover
Control type: electronic
LCD display
Sound signal of product readiness
Choice of crust color
Selecting the weight of the finished product
Functions:
- automatic heating up to 1 hour
- delayed start up to 16 hours
Color: white and black
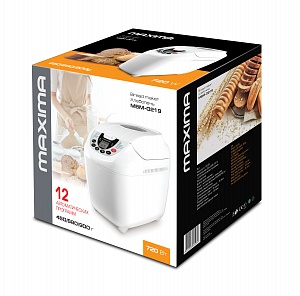
Description of the bread maker MAXIMA MBM-0219
The MAXIMA MBM-0219 bread maker is equipped with an ergonomic control panel with easy navigation. An inspection window located on the lid of the bread machine allows you to visually control the cooking process. 14 automatic programs allow you to cook not only a variety of fresh pastries, preserves and jams, but also pilaf, soup, cereals in water and milk, various types of dough, desserts and yoghurts.
Connoisseurs of fresh bread and mouth-watering pastries will appreciate the choice of baked goods weight and crust color.
The keep warm function starts automatically at the end of the cooking process and maintains the temperature for 1 hour.
Open a small bakery-pastry shop at home, treat yourself and your loved ones with aromatic bread and other delicacies made with your own hands using the MAXIMA bread machine.
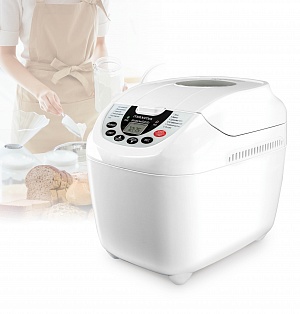
Bread maker device MAXIMA MBM-0219
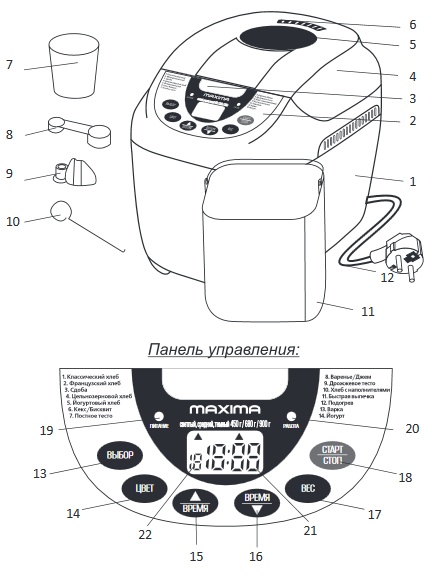
1. Instrument body
2. Control panel
3. Cover lock button
4. Cover
5. Observation window
6. Ventilation grilles
7. Measuring glass
8. Double-sided measuring spoon
9. Kneading paddle
10. Hook for removing the blade from the bread
11. Working container - baking dish
12. Power cord
13. "Select" - button for selecting the program of work
14. "Color" - button for the degree of baking of the crust
15. "Time ▲" - button for increasing the timer time
16. "Time ▼" - button to decrease the timer time
17. "Weight" - the button for setting the weight of the baked goods
18. "Start / Stop" - start / stop button
19. Power - power indicator
20. Work - work indicator
21. Timer
22. Selected program number indicator
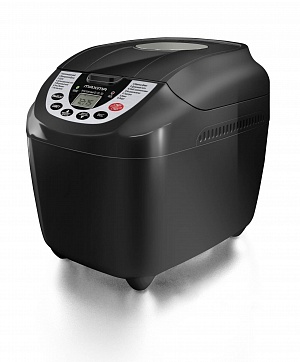
Complete set of bread maker Maxima MBM-0219
Bread maker 1 pc.
Baking dish 1 pc.
Measuring cup 1 pc.
double-sided measuring spoon 1 pc.
Kneading paddle 1 pc.
Blade extraction hook 1 pc.
Book "50 recipes" 1 pc.
Service book 1 pc.
Operating instructions 1 pc.
Before first use
Carefully remove the product from the box and remove all packing materials and advertising labels except the serial number label. The absence of a serial number on a product automatically voids your right to warranty service. Read the operating instructions carefully to avoid future damage to the device.
Wipe the body of the instrument with a damp cloth. Rinse the bowl with warm soapy water. Dry thoroughly (see Cleaning and Care section).
Place the product on a firm, level, horizontal surface. During installation, make sure that during operation of the device its ventilation is not impeded and that the escaping hot air does not fall on wallpaper, decorative coverings, electronic devices and other objects that may suffer from high humidity and temperature. Before cooking, make sure that the internal and external parts of the appliance are not damaged, chipped or other defects, there are no foreign objects between the baking dish and the heating element.
• When using the bread maker for the first time, there may be an odor from the burnout of industrial process lubricants on the heating element of the device. This is not a manufacturing defect.
• The device can be used again no earlier than 30 minutes after removing the finished product.
• In the event of any error in operation or mechanical obstacle to kneading the dough, an automatic error detection system is triggered with a sound signal.
• ATTENTION! The appliance gets very hot during cooking! Use oven mitts to avoid burns.
Non-volatile memory
The MAXIMA MBM-0219 bread maker has a nonvolatile memory, which allows saving the entered settings for 30 minutes when the power supply to the bread machine is turned off and then resume the interrupted workflow. If there is no power supply for more than 30 minutes, all settings made will be reset and the cooking process will be stopped.
Delayed start function
The MAXIMA MBM-0219 bread maker has a delayed start function, thanks to which you can set a specific time in the range of up to 16 hours in 10-minute increments, after which the product or dish will be cooked.
The delayed start time value must include the duration of the cooking program (i.e., be greater than the cooking time of the dish), otherwise the program will start immediately after the function is turned on.
IMPORTANT! The delayed start function is not available for programs 6, 7, 8, 9, 11. • It is not recommended to use the delayed start function if the recipe uses dairy or perishable products as ingredients (eggs, fresh milk, meat, cheese, etc.).
Ingredients
All ingredients used should be at ambient temperature (unless otherwise noted) and carefully weighed. Measure out liquids using the supplied measuring cup. Use a double dosing spoon, a tablespoon, and a teaspoon.
1. Flour... The weight of flour strongly depends on its type. Depending on the quality of the flour, the resulting baked goods may vary. Store flour in an airtight container, as it can react to fluctuations in temperature and humidity, absorbing or, conversely, releasing moisture. It is advisable to use so-called "strong", "bread" or "baking" flour rather than the standard type. Adding oat flour, bran, wheat germ, rye flour, and finally whole grains to the dough results in a heavier and less fluffy bread. The results are also influenced by the degree of sifting of the flour - the more whole it is (that is, there are particles of the shell of wheat grains), the less the dough rises and the denser the bread turns out.
2. Yeast provide dough rise. Use active dry yeast in sachets. Yeast quality varies and does not always expand in the same way. Thus, the quality of the bread can vary depending on the yeast used. Old or improperly stored yeast does not "work" as well as freshly opened dry yeast. All recipes are for dehydrated yeast. If you are using fresh yeast, you should take a triple (by weight) amount and dilute with a little warm, slightly sugared water for more effective action.
3. Salt adds flavor to baked goods and allows you to regulate the activity of the yeast (while it should not come into contact with them directly). The salt makes the dough harder, more compact and does not rise as quickly. Also, salt improves the structure of the dough.
4. Fats and vegetable oil add fluffiness and flavor to the bread. In addition, such bread has a longer shelf life. Excess fat slows down the rise of the dough. If you are using butter, cut it into small pieces to distribute it more evenly in the dough, or soften it beforehand.
5. Sugar nourishes the yeast, gives the bread flavor and improves the brown color of the crust. It is preferable to use sucrose, raw sugar or honey. Never use refined sugar or lump sugar.
6. Water saturates and activates the yeast. It also saturates the starch contained in the flour and provides crumb formation.Water can be partially or completely replaced with milk or other liquids. the liquid added to the dough should be at room temperature.
7. Eggs enrich the dough, improve the color of the bread and contribute to the formation of a tasty crumb. If using eggs, reduce the amount of liquid ingredients. break an egg and add liquids to the amount indicated in the recipe. recipes call for an average egg of 50 grams; for larger eggs, add a little flour, for smaller eggs, reduce the amount.
8. Milk you can use fresh or powdered. Using powdered milk, add water to the originally indicated volume. You can also add water to fresh milk - the total volume of liquid should be equal to the volume specified in the recipe.
9. Additives... You can add any additives you want, however, you must strictly observe the time for adding additives indicated by the beep. Also keep in mind that the hardest grains (such as flaxseed or sesame seeds) are best added at the very beginning of kneading to facilitate the use of the bread maker (for example, when setting the time manually). Thoroughly drain moisture from very damp ingredients (e.g. olives). Fat ingredients should be lightly dusted in flour to get a smoother dough and do not add too much of them - this can damage the dough.
to obtain a high-quality result, we suggest using the recipes for cooking pastries and various dishes from the book "50 recipes" attached to the MAXIMA MBM-0219 bread maker, developed specifically for this model.
this book is the result of a lot of hard work. All the recipes presented in it were developed and prepared in the MAXIMA MBM-0219 bread maker by a team of our chefs, and all the products used in their preparation were purchased in regular stores.
The ingredients indicated in the recipes, their weight, proportions were carefully selected depending on the volume and type of product, and the instructions for the sequence of actions or the use of automatic cooking programs were based on the peculiarities of the operation of this model. In addition, the book contains a lot of tips from our chefs that you will surely find useful.
The sequence of laying out the ingredients for baking
To make the baked goods beautiful and tasty, you must follow a certain sequence of mixing the ingredients. First, the liquid ingredients (water, milk, vegetable oil, eggs) are placed in a baking dish. Then - dry (salt, sugar, milk powder), then flour. yeast and baking powder should only be placed on dry flour. They should never come into contact with any liquids prior to mixing. Fillers (whole grains, nuts, grated cheese, fresh fruit, candied fruits, etc.) are placed in the mold just before mixing. Be careful with fresh fruits and nuts as they contain additional liquid (juice and oil) that must be considered when adding the rest of the liquid ingredients. it is advisable to mix additional ingredients when the bread maker beeps during kneading in the program. Do not add more ingredients than indicated in the recipe, or the bread may not rise.
Classic bread program
This is a basic cooking program that is ideal for baking white and rye bread. When you turn on the device, the program is installed automatically.
1. Prepare the ingredients according to the recipe and transfer them to a baking dish in the order shown.
2. Place the dish with the ingredients in the appliance, turn the dish slightly clockwise to fix it.
3. Close the cover until it clicks, connect the power plug to the power supply (the power indicator will light up).
4. Press the "Select" button to select the number of the required cooking program (the display will show the program run time).
5. By pressing the "Weight" button, set the planned weight of the finished product (450, 680 or 900 g).
6. Press the "Color" button to set the desired degree of baking (light, medium or dark). When changing the parameters of the weight and color of the crust, the program runtime will change.
7. If necessary, press the "Time ▼" and "Time ▲" buttons to set the time for the delayed start function.
8. Press the “Start / Stop” button until a beep appears. The OPERATION indicator will light up and the countdown of the set run time will begin.
9. At the end of the program, a signal will sound, the auto-heating function will turn on, which will maintain the temperature of the cooked product for an hour.
10. Press and hold the “Start / Stop” button until the sound signal and the OPERATION indicator go off to turn off the auto-heating function.
11. Open the cover. Using oven mitts, gently grip the handle, turn it slightly counterclockwise and remove it from the appliance.
12. Place the finished product by turning the dish over a low-heat surface (wooden board or wire rack) and cover with a towel to cool slowly. To avoid damage to the baking dish and its non-stick coating, do not knock on it or cut bread out of it with a knife. After half an hour, remove the blade from the cooled bread using a hook.
13. to stop the cooking process and reset the settings, press and hold the “Start / Stop” button until the sound signal and the OPERATION indicator turn off.
French Bread Program
It is intended for preparation of soft, airy white bread with a crispy crust. This program is a little longer than the basic one because of the long kneading time.
1. Prepare the recipe ingredients and place them in a baking dish in the order shown.
2. Place the dish with the ingredients in the appliance; turn the dish slightly clockwise to fix it.
3. Close the cover until it clicks, connect the power plug to the power outlet (the power indicator will light up).
4. Press the "Select" button to select the number of the required cooking program (the display will show the program run time).
5. Press the "Weight" button to set the planned weight of the finished product (450, 680 or 900 g).
6. Press the "Color" button to set the desired degree of baking (light, medium or dark). When changing the parameters of the weight and color of the crust, the running time of the program will change.
7. If necessary, press the "Time ▼" and "Time ▲" buttons to set the time for the delayed start function.
8. Press the “Start / Stop” button until a beep appears. The OPERATION indicator will light up and the countdown of the set run time will begin.
9. At the end of the program, a signal will sound, the auto-heating function will turn on, which will maintain the temperature of the cooked product for an hour.
10. Press and hold the “Start / Stop” button until the sound signal and the OPERATION indicator go off to turn off the auto-heating function.
11. Open the cover. Using oven mitts, gently grip the handle, turn it slightly counterclockwise and remove it from the appliance.
12. Place the finished product by turning the dish over a low-heat surface (wooden board or wire rack) and cover with a towel to cool slowly. To avoid damage to the baking dish and its non-stick coating, do not knock on it or cut bread out of it with a knife. After half an hour, remove the blade from the cooled bread using a hook.
13. to stop the cooking process and reset the settings, press and hold the “Start / Stop” button until the sound signal and the OPERATION indicator turn off.
Baking program
It is intended for preparation of sweet types of bread (muffins) of small volumes.
one. Prepare the ingredients according to the recipe and transfer them to a baking dish in the order shown.
2. Place the dish with the ingredients in the appliance; turn the dish slightly clockwise to fix it.
3. Close the cover until it clicks, connect the power plug to the power outlet (the power indicator will light up).
4. Press the "Select" button to select the number of the required cooking program (the display will show the program run time).
5. Press the "Weight" button to set the planned weight of the finished product (450, 680 or 900 g).
6. Press the "Color" button to set the desired degree of baking (light, medium or dark).
When changing the parameters of the weight and color of the crust, the running time of the program will change.
7. If necessary, press the "Time ▼" and "Time ▲" buttons to set the time for the delayed start function.
8. Press the “Start / Stop” button until a beep appears. The OPERATION indicator will light up and the countdown of the set run time will begin.
9. At the end of the program, a signal will sound, the auto-heating function will turn on, which will maintain the temperature of the cooked product for an hour.
10. Press and hold the “Start / Stop” button until the sound signal and the OPERATION indicator go off to turn off the auto-heating function.
11. Open the cover. Using oven mitts, gently grip the handle, turn it slightly counterclockwise and remove it from the appliance.
12. Place the finished product by turning the dish over a low-heat surface (wooden board or wire rack) and cover with a towel to cool slowly. To avoid damage to the baking dish and its non-stick coating, do not knock on it or cut bread out of it with a knife. After half an hour, remove the blade from the cooled bread using a hook.
13. to stop the cooking process and reset the settings, press and hold the “Start / Stop” button until the sound signal and the OPERATION indicator turn off.
Whole Grain Bread Program
It is intended for making bread with the addition of whole grains of various cereals or with bran. A more thorough kneading of the dough using this program allows you to bake bread with the least amount of gluten.
1. Prepare the ingredients according to the recipe and transfer them to the mold
for baking in the specified sequence.
2. Place the dish with the ingredients in the appliance; turn the dish slightly clockwise to fix it.
3. Close the cover until it clicks, connect the power plug to the power outlet (the power indicator will light up).
4. Press the "Select" button to select the number of the required cooking program (the display will show the program run time).
5. Press the "Weight" button to set the planned weight of the finished product (450, 680, 900 g).
6. Press the "Color" button to set the desired degree of baking (light, medium or dark).
When changing the parameters of the weight and color of the crust, the running time of the program will change.
7. If necessary, press the "Time ▼" and "Time ▲" buttons to set the time for the delayed start function.
8. Press the “Start / Stop” button until a beep appears. The OPERATION indicator will light up and the countdown of the set run time will begin.
9. At the end of the program, a signal will sound, the auto-heating function will turn on, which will maintain the temperature of the cooked product for an hour.
10. Press and hold the “Start / Stop” button until the sound signal and the OPERATION indicator go off to turn off the auto-heating function.
11. Open the cover. Using oven mitts, gently grip the handle, turn it slightly counterclockwise and remove it from the appliance.
12. Place the finished product by turning the dish over a low-heat surface (wooden board or wire rack) and cover with a towel to cool slowly.To avoid damage to the baking dish and its non-stick coating, do not knock on it or cut bread out of it with a knife. After half an hour, remove the blade from the cooled bread using a hook.
13. to stop the cooking process and reset the settings, press and hold the “Start / Stop” button until the sound signal and the OPERATION indicator turn off.
Yoghurt Bread Program
Designed for making bread with a sour taste (due to the addition of yogurt to the batch).
1. Prepare the recipe ingredients and place them in a baking dish in the order shown.
2. Place the dish with the ingredients in the appliance, turn the dish slightly clockwise to fix it.
3. Close the cover until it clicks, connect the power plug to the power outlet (the power indicator will light up).
4. Press the "Select" button to select the number of the required cooking program (the display will show the program run time).
5. Press the "Weight" button to set the planned weight of the finished product (450, 680 or 900 g).
6. Press the "Color" button to set the desired degree of baking (light, medium or dark). When changing the parameters of the weight and color of the crust, the program runtime will change.
7. If necessary, press the "Time ▼" and "Time ▲" buttons to set the time for the delayed start function.
8. Press the “Start / Stop” button until a beep appears. The OPERATION indicator will light up and the countdown of the set run time will begin.
9. At the end of the program, a signal will sound, the auto-heating function will turn on, which will maintain the temperature of the prepared product for an hour.
10. Press and hold the “Start / Stop” button until the beep and the OPERATION indicator go off to turn off the auto-heating function.
11. Open the cover. Using oven mitts, gently grip the handle, turn it slightly counterclockwise and remove it from the appliance.
12. Place the finished product by turning the dish over a low-heat surface (wooden board or wire rack) and cover with a towel to cool slowly. To avoid damage to the baking dish and its non-stick coating, do not knock on it or cut bread out of it with a knife. After half an hour, remove the blade from the cooled bread using a hook.
13. to stop the cooking process and reset the settings, press and hold the “Start / Stop” button until the sound signal and the OPERATION indicator turn off.
Cupcake / Biscuit program
Suitable for preparing muffins, various pies, etc. The delayed start function is not available in this program.
1. Prepare the recipe ingredients and place them in a baking dish in the order shown.
2. Place the dish with the ingredients in the appliance, turn the dish slightly clockwise to fix it.
3. Close the cover until it clicks, connect the power plug to
(the power indicator lights up).
4. Press the "Select" button to select the number of the required cooking program (the display will show the program run time).
5. Press the "Weight" button to set the planned weight of the finished product (450, 680 or 900 g).
6. Press the "Color" button to set the desired degree of baking (light, medium or dark). When changing the parameters of the weight and color of the crust, the program runtime will change.
7. Press the “Start / Stop” button until a beep appears. The OPERATION indicator will light up and the countdown of the set run time will begin.
8. At the end of the program, a signal will sound, the auto-heating function will turn on, which will maintain the temperature of the prepared product for an hour.
9. Press and hold the “Start / Stop” button until the sound signal and the OPERATION indicator go off to turn off the auto-heating function.
10. Open the cover.Using oven mitts, gently grip the handle, turn it slightly counterclockwise and remove it from the appliance.
11. Place the finished product by turning the dish over a low-heat surface (wooden board or wire rack) and cover with a towel to cool slowly. To avoid damage to the baking dish and its non-stick coating, do not knock on it or cut bread out of it with a knife. After half an hour, remove the blade from the cooled bread using a hook.
12. To stop the cooking process and reset the settings, press and hold the “Start / Stop” button until the sound signal and the OPERATION indicator turn off.
Lean dough program
It is intended for making dough, from which you can further form homemade noodles or vermicelli. In this program, the delayed start function, the selection of the baking weight and crust color are not available.
1. Prepare the ingredients according to the recipe and transfer them to a baking dish in the order shown.
2. Place the dish with the ingredients in the appliance, turn the dish slightly clockwise to fix it.
3. Close the cover until it clicks, connect the power plug to the power supply (the power indicator will light up).
4. Press the "Select" button to select the number of the required cooking program (the display will show the program run time).
5. Press the "Start / Stop" button until a beep appears.
The OPERATION indicator will light up and the countdown of the set run time will begin.
6. At the end of the program, a signal will sound, the auto-heating function will turn on, which will maintain the temperature of the cooked product for an hour.
7. Press and hold the “Start / Stop” button until the beep and the OPERATION indicator go off to turn off the auto-heating function.
8. Open the cover. Using oven mitts, gently grip the handle, turn it slightly counterclockwise and remove it from the appliance.
9. Place the finished product by turning the dish over a low-heat surface (wooden board or wire rack) and cover with a towel to cool slowly. To avoid damage to the baking dish and its non-stick coating, do not knock on it or cut bread out of it with a knife. After half an hour, remove the blade from the cooled bread using a hook.
10. to stop the cooking process and reset the settings, press and hold the “Start / Stop” button until the sound signal and the OPERATION indicator goes off.
Jam / jam program
Designed for the preparation of preserves, jams and fruit mixtures. In this program, the delayed start function, the selection of the baking weight and crust color are not available.
1. Prepare the ingredients according to the recipe and transfer them to a baking dish.
2. Place the dish with the ingredients in the appliance, turn the dish slightly clockwise to fix it.
3. Close the cover until it clicks, connect the power plug to the power supply (the power indicator will light up).
4. Press the "Select" button to select the number of the required cooking program (the display will show the program run time).
5. Press the “Start / Stop” button until a beep appears. The OPERATION indicator will light up and the countdown of the set run time will begin.
6. At the end of the program, a signal will sound, the auto-heating function will turn on, which will maintain the temperature of the cooked product for an hour.
7. Press and hold the “Start / Stop” button until the beep and the OPERATION indicator go off to turn off the auto-heating function.
8. Open the cover. Using oven mitts, gently grasp the mold by the handle, turn it slightly counterclockwise and remove it from the appliance.
9. Place the finished product by turning the dish over a low-heat surface (wooden board or wire rack) and cover with a towel to cool slowly.To avoid damage to the baking dish and its non-stick coating, do not knock on it or cut bread out of it with a knife. After half an hour, remove the blade from the cooled bread using a hook.
10. To stop the cooking process and reset the settings, press and hold the “Start / Stop” button until the beep sounds and the OPERATION indicator turns off.
Yeast dough program
Designed for making yeast dough. In this program, the delayed start function, the selection of the baking weight and crust color are not available.
1. Prepare the recipe ingredients and place them in a baking dish in the order shown.
2. Place the dish with the ingredients in the appliance; turn the dish slightly clockwise to fix it.
3. Close the cover until it clicks, connect the power plug to the power outlet (the power indicator will light up).
4. Press the "Select" button to select the number of the required cooking program (the display will show the program run time).
5. Press the “Start / Stop” button until a beep appears. The OPERATION indicator will light up and the countdown of the set run time will begin.
6. At the end of the program, a signal will sound, the auto-heating function will turn on, which will maintain the temperature of the cooked product for an hour.
7. Press and hold the “Start / Stop” button until the beep and the OPERATION indicator go off to turn off the auto-heating function.
8. Open the cover. Using oven mitts, gently grip the handle, turn it slightly counterclockwise and remove it from the appliance.
9. Place the finished product by turning the dish over a low-heat surface (wooden board or wire rack) and cover with a towel to cool slowly. To avoid damage to the baking dish and its non-stick coating, do not knock on it or cut bread out of it with a knife. After half an hour, remove the blade from the cooled bread using a hook.
10. To stop the cooking process and reset the settings, press and hold the “Start / Stop” button until the sound signal and the OPERATION indicator goes off.
Filled Bread Program
Designed for baking sandwich bread and sandwiches.
1. Prepare the recipe ingredients and place them in a baking dish in the order shown.
2. Place the dish with the ingredients in the appliance; turn the dish slightly clockwise to fix it.
3. Close the cover until it clicks, connect the power plug to the power outlet (the power indicator will light up).
4. Press the "Select" button to select the number of the required cooking program (the display will show the program run time).
5. Press the "Weight" button to set the planned weight of the finished product (450, 680 or 900 g).
6. Press the "Color" button to set the desired degree of baking (light, medium or dark). When changing the parameters of the weight and color of the crust, the running time of the program will change.
7. If necessary, press the "Time ▼" and "Time ▲" buttons to set the time for the delayed start function.
8. Press the “Start / Stop” button until a beep appears. The OPERATION indicator will light up and the countdown of the set run time will begin.
9. At the end of the program, a signal will sound, the auto-heating function will turn on, which will maintain the temperature of the cooked product for an hour.
10. Press and hold the “Start / Stop” button until the sound signal and the OPERATION indicator go off to turn off the auto-heating function.
11. Open the cover. Using oven mitts, gently grip the handle, turn it slightly counterclockwise and remove it from the appliance.
12. Place the finished product by turning the dish over a low-heat surface (wooden board or wire rack) and cover with a towel to cool slowly.To avoid damage to the baking dish and its non-stick coating, do not knock on it or cut bread out of it with a knife. After half an hour, remove the blade from the cooled bread using a hook.
13. to stop the cooking process and reset the settings, press and hold the “Start / Stop” button until the sound signal and the OPERATION indicator turn off.
Fast baking program
Designed for making denser types of bread in a shorter cycle. The appliance will independently determine the parameters for the crust color and baked weight in order to obtain the best result. In this program, the delayed start function, the selection of the baking weight and crust color are not available.
1. Prepare the recipe ingredients and place them in a baking dish in the order shown.
2. Place the dish with the ingredients in the appliance; turn the dish slightly clockwise to fix it.
3. Close the cover until it clicks, connect the power plug to the power outlet (the power indicator will light up).
4. Press the "Select" button to select the number of the required cooking program (the display will show the program run time).
5. Press the “Start / Stop” button until a beep appears. The OPERATION indicator will light up and the countdown of the set run time will begin.
6. At the end of the program, a signal will sound, the auto-heating function will turn on, which will maintain the temperature of the cooked product for an hour.
7. Press and hold the “Start / Stop” button until the beep and the OPERATION indicator go off to turn off the auto-heating function.
8. Open the cover. Using oven mitts, gently grip the handle, turn it slightly counterclockwise and remove it from the appliance.
9. Place the finished product by turning the dish over a low-heat surface (wooden board or wire rack) and cover with a towel to cool slowly. To avoid damage to the baking dish and its non-stick coating, do not knock on it or cut bread out of it with a knife. After half an hour, remove the blade from the cooled bread using a hook.
10. To stop the cooking process and reset the settings, press and hold the “Start / Stop” button until the sound signal and the OPERATION indicator goes off.
Heating program
Designed to keep the finished product hot.
1. Transfer food to a baking dish.
2. Place the mold in the appliance, turn the mold slightly clockwise to fix it.
3. Close the cover until it clicks, connect the power plug to the power outlet (the power indicator will light up).
4. Press the "Select" button to select the number of the required cooking program (the display will show and start flashing the default program time).
5. Press the "Time ▼" and "Time ▲" buttons to set the required program runtime.
6. Press the "Start / Stop" button to save the value and exit the cooking time setting mode (the numbers on the display will stop flashing).
7. If necessary, press the "Time ▼" and "Time ▲" buttons to set the time for the delayed start function (see page 10).
8. Press the “Start / Stop” button until a beep appears. The OPERATION indicator will light up and the countdown of the set run time will begin.
9. At the end of the program, a signal will sound and the auto-heating function will turn on, which will maintain the temperature of the cooked product for an hour.
10. To turn off the auto-heating function, press and hold the “Start / Stop” button until the sound signal and the OPERATION indicator goes off.
11. Open the cover. Using oven mitts, gently grip the handle, turn it slightly counterclockwise and remove it from the appliance.
Cooking program
Designed for cooking cereals, soups, pilaf. The cooking time can be manually set in the range from 30 minutes to 2 hours with a setting step of 5 minutes.
one. Prepare the ingredients according to the recipe and transfer them to a baking dish. Make sure that all ingredients (including liquid) are no more than 2/3 of the bowl volume.
2. Place the dish with the ingredients in the appliance; turn the dish slightly clockwise to fix it.
3. Close the cover until it clicks, connect the power plug to the power outlet (the power indicator will light up).
4. Press the Select button to select the desired cooking program number. The display will show the default run time and start flashing.
5. Press the "Time ▼" and "Time ▲" buttons to set the program running time according to the recipe.
6. Press the "Start / Stop" button to save the value and exit the cooking time setting mode (the numbers on the display will stop flashing).
7. If necessary, press the Time ▼ and Time A buttons to set the time for the delayed start function (see page).
8. Press the “Start / Stop” button until a beep appears. The OPERATION indicator will light up and the countdown of the set run time will begin.
9. At the end of the program, a signal will sound and the auto-heating function will turn on, which will maintain the temperature of the cooked product for an hour.
10. Press and hold the “Start / Stop” button until the sound signal and the OPERATION indicator go off to turn off the auto-heating function.
11. Open the cover. Using oven mitts, gently grip the handle, turn it slightly counterclockwise and remove it from the appliance.
12. to stop the cooking process and reset the settings, press and hold the “Start / Stop” button until the sound signal and the OPERATION indicator turn off.
Yoghurt program
Designed for the preparation of various types of yoghurt. It is possible to manually set the cooking time in the range from 5 to 12 hours with a setting step of 5 minutes.
1. Prepare the ingredients according to the recipe and transfer them to a baking dish.
2. Place the dish with the ingredients in the appliance; turn the dish slightly clockwise to fix it.
3. Close the cover until it clicks, connect the power plug to the power outlet (the power indicator will light up).
4. Press the Select button to select the desired cooking program number. The display will show the default run time and start flashing.
5. Press the "Time ▼" and "Time W" buttons to set the program runtime according to the recipe.
6. Press the "Start / Stop" button to save the value and exit the cooking time setting mode (the numbers on the display will stop flashing).
7. If necessary, press the "Time ▼" and "Time ▲" buttons to set the time for the delayed start function (see page 10).
8. Press the “Start / Stop” button until a beep appears. The OPERATION indicator will light up and the countdown of the set run time will begin.
9. At the end of the program, a signal will sound.
10. Open the lid, gently take the mold by the handle, turn it slightly counterclockwise and remove it from the device.
11. To stop the cooking process and reset the settings, press and hold the "Start / Stop" button until the sound signal and the OPERATION indicator goes off.
Cleaning and care
1. Thoroughly clean the device after each use. This will significantly extend its service life.
2. Before cleaning the appliance, make sure that it is unplugged and completely cooled down. Use a soft cloth and non-abrasive dishwashing detergent. We advise you to clean the device immediately after use.
Do not use hard or abrasive sponges, abrasive cleaners or aggressive solvents such as benzine and acetone.
1. Wash all parts of the Bread Maker. Do not allow water to enter the device case. Pre-soak the baking dish in a solution of detergent - this in some cases makes it easier to remove the spatula from the shaft.
2.Do not wash the product and its components in the dishwasher.
3. After cleaning the bread maker, wipe all parts dry with a soft cloth.
Store the product in a cool dry place.
|


