Ariete 132. Description and characteristics of the bread maker |
|
Technical characteristics of the Ariete 132 bread machinePower 500 W ProgramsNumber of baking programs 19 Additional InformationMemory reserve in case of power failure 10 min
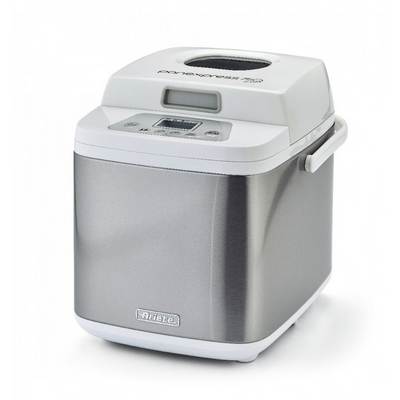
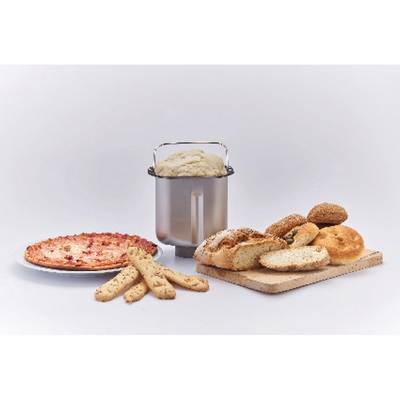
Description of the Ariete 132 bread makerConvenient and reliableThe Ariete 132 bread maker is very handy and easy to use. It has a power of 500 watts, which is enough for its excellent performance. With such an assistant, you can bake bread weighing 500 and 750 g. The body of the bread machine is metal, it will look great in any kitchen. The bread container has a non-stick coating, so you don't have to worry about baked goods burning. She is a great gift for lovers of pies, buns. Programs and featuresBuy Ariete132 - purchase equipment that will help you make gluten-free bread. It has 19 preset programs, including a program for making jam. Your assistant will be able to bake French, whole grain, rye and many other types of bread. Includes measuring cup, measuring spoon, dough hook. Ever wanted not to buy bread in the store, but to bake it at home? Equip yourself with this device - indulge your homemade delicious pastries. Perfect bakingThe price of the Ariete 132 Pane Express 750 Metal is a fee for the technique to help you make perfect bread. You can choose the color of the loaf's crust. Through the viewing window in the body of the device, you can observe the cooking process. An important feature is the delayed start function. You can program the bread maker to start working after 15 hours. If you've forgotten about pie or buns, don't worry. The device will keep warm for another hour.
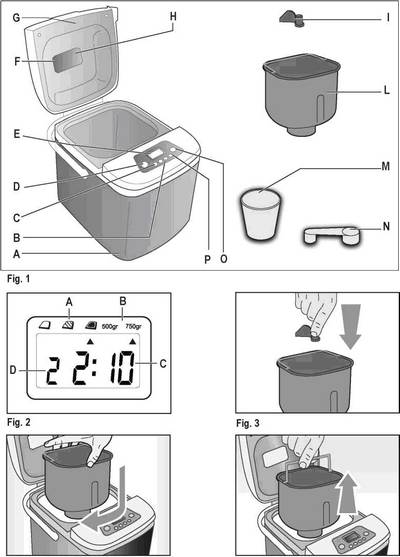
A Instrument body DisplayA Peel staining This device will save you energy. The main advantage of this device is that all operations for kneading, fermenting dough and baking bread are carried out in one place. Your bread maker will bake you great bread easily and with the necessary frequency. You just need to follow the instructions and do not forget about some basic rules. The device cannot think for you. He cannot tell you that you forgot to put in an ingredient, or you put the wrong ingredient, or you measured it wrong. The careful selection of ingredients is the most important step in the baking process. Before using the appliance1) Wash and dry all parts as described in the CLEANING AND MAINTENANCE section. 2) Switch the oven to Bake mode and run it empty for about 10 minutes. 3) After the bread maker has cooled down, wash it again. Attention! During the first baking cycle, smoke may come out of the appliance or a slight burning smell may be felt. This is completely normal and will disappear after a few seconds.
Manual1) Thoroughly wash and dry all parts of the appliance. 2) Place the stirring paddle (I) on the pin inside the mold (L). 3) Measure out the ingredients using the measuring cup (M) or spoon (N) supplied with the appliance, or weigh them and place them in the mold (L). 4) Place the mold on the corresponding pin inside the appliance, turning it clockwise until it is completely locked. Attention! It is very important to consistently follow all the steps for adding ingredients as described in the recipe. The basic order for adding ingredients is liquid ingredients, water, flour, egg and then the rest of the ingredients according to the recipe. Add yeast at the last moment right inside all the ingredients. Try not to mix yeast with liquid ingredients or salt. 5) Close the cover (G) and insert the plug into an electrical outlet. The display (E) will show "3:00" with a solid colon. The stove is automatically set to program "1". 6) Press button (D) until the required baking program is reached. 7) Press the button (C) to select the desired product weight (500g, 750g). For modes 8-19, product weight selection is not provided. 8) Select the desired degree of crust coloration (light, medium or dark). For programs 8-19, there is no selection of the degree of crust coloration 9) If necessary, set the timer value using the + or - (B) buttons. Baking will start when the set time has elapsed. If the start time has not been set in advance, baking will start immediately. Take special care when using the timer with perishable ingredients (eg eggs, dairy products, etc.). 10) Press the on / off button (0). The bread maker will beep and start processing the ingredients (in timer mode, processing starts after the time set on the timer). Steam comes out of the hole under the lid (G) during baking: this is completely normal. 11) If, according to the set program, the addition of ingredients (dried fruits, seeds, etc.) is provided, then the bread maker will emit 10 short beeps that warn about the need to lift the lid and add the required ingredients. The time may vary depending on the set mode. 12) To stop the preset program, press the on / off button (0) and keep it pressed for 3 seconds. 13) When the display (E) shows the time "0:00" it means that the baking process is complete. The bread maker will emit a short beep 10 times and automatically switch to “Keep warm” for 1 hour. The symbol will flash (except for the mixing program). 14) The dough will be warm for 1 hour, after which the “Keep warm” mode will turn off. The symbol (©) appears on the display. To deactivate the "Keep warm" mode before the end of 60 minutes, press the On / Off button (O) and hold it for 3 seconds. 15) Remove the plug from the electrical outlet and open the cover (G) 16) Put on oven mitts and firmly grasp the handle of the mold (L) and turn it counterclockwise to unlock and remove the mold. 17) Wait for the bread to cool and just remove it from the mold using a spatula with a non-stick coating, starting from the sides. If necessary, turn the pan over onto the cooling rack or some clean surface, gently shaking it until the bread is completely empty. The mold can get very hot. Handle it with great care and always wear special protective gloves. It is not recommended to use metal tools to remove bread from the mold (L), as this will damage the non-stick coating. Power outageIf the power outage lasts less than 10 minutes, the bread maker will resume its work as soon as the power is available. If the shutdown lasts more than 15 minutes, the fuser stops working and the display restores the default settings. In this case, it is necessary to disconnect the stove from the mains, let it cool, empty the mold, remove the ingredients from there, clean and then restart the process. Ariete Bread Makers Discussion Error codesIn the event of a malfunction of the device, the following error codes may appear on the display (E): - "H: HH": too high temperature inside the mold. 1) Press the on / off button (0) and hold it for 3 seconds to stop the program. 2) Pull out the plug. 3) Open the lid and let the device cool down for 10-20 minutes. 4) Run the program again. - "E: EO": The temperature sensor is disabled or does not work. Take the instrument to an Authorized Service Center to test the touch sensor function. Timerthe timer is most often used to bake bread at night so that it is ready in the morning. The timer allows you to delay the baking of bread up to 15 hours. It is not recommended to use fresh milk, yoghurt, cheese, eggs, fruit, onions, or any other ingredients that could spoil if left in a warm, humid atmosphere for several hours for making bread or kneading dough. Decide when you want to get your bread ready, for example at 6 a.m. Check at what time you start the program, for example, at 9 o'clock. Count the number of hours between these two time points, in this case, it is 9 hours. Each time you press the up / down buttons (B), the timer value will either increase or decrease by 10 minutes. It is impossible to change the time of execution of a certain action provided by the program. Density of the dough when kneadingObserve the dough during the first 5 minutes of kneading through the appropriate viewing window (H). Smooth bread should form. Otherwise, it is necessary to check the ingredients used again. If it becomes necessary to open the lid (G), it is best to do so during kneading or dough holding. In all other cases, this can affect the successful result of the finished bread. If the dough feels sticky and sticks to the sides of the mold, sprinkle a spoonful of flour on top of it. If it's too dry, pour a spoonful of warm water over it. You can use a wooden or plastic spatula to carefully remove ingredients that have adhered to the side of the appliance. Attention Do not leave the door open longer than necessary. Wait until the flour / water is completely dissolved in the dough before adding more. Close the lid (G) before the end of the last kneading step, otherwise the bread will not rise. Bread storageBread that is sold in stores usually contains various additives (chlorine, lime, mountain resin dye, sorbitol, soy, etc.). Your bread will not have any of these substances, so it will have a shorter shelf life and look different. In addition, it will have a different smell than store-bought bread and the taste that real bread should have. It is best eaten fresh, but it can also be stored for two days at room temperature in a plastic bag, after removing all the air from there. To freeze homemade bread, first let it cool, then put it in a plastic bag and remove all the air from there, then seal it and put it in the freezer.
How to add ingredients- Follow the procedure indicated in the recipe. - Prepare and set aside additional ingredients (fruits, nuts, raisins, etc.) to add them during the second batch after the appliance beeps 10 times. - Add liquid ingredients first. This is usually water, but it can also be milk and / or egg. The water should be warm (37 ° C), not hot. Water that is too cold or too hot can prevent the dough from rising. - Do not use milk when the timer is running. It may curl up before the baking process begins. - Add sugar and salt according to the recipe. - Add other "liquid" ingredients (honey, syrup, molasses, etc.). - Add other "hard" ingredients (flour, milk powder, herbs and spices). - If using the timer, it is not possible to add fruits or nuts during the second batch, so add them now. - Add dry yeast (or powdered yeast / baking soda) last. Add other ingredients on top - do not put them directly in the water, or the process will start too early. - When using the timer, it is very important to ensure that the yeast (yeast powder / soda) does not come into contact with the water, otherwise the yeast will rise too early and sink before the bread baking process begins. The result is too hard, coarse and dense bread, similar in quality to brick that is not used for food. It is recommended to make a depression in the center of the flour pile and put yeast in it. FlourIt is very important what kind of flour you use. The most important element in flour is a protein called gluten, which is a natural substance that gives the dough the consistency that allows it to mold and also retains the carbon dioxide contained in the yeast. Purchase flour that says Type 0 or Bread Baking (Manitoba variety). The latter has a very high gluten content. Other flours for baking bread These include whole grain flour and flour made from other grains. These varieties are an excellent source of dietary fiber, but also have a lower gluten content than white flour. Which means that loaves of wholegrain bread are more likely to be smaller and denser in texture than white bread. In general terms, if you substitute half of the "Type 0" white flour in a recipe with whole grain flour, you can get a bread with a whole grain flavor and a white texture. YeastYeast is a living organism that grows inside the dough. On contact with moisture, food, and heat, yeast grows and releases carbon dioxide in a gaseous state. Bubbles appear from the gas, which remain in the dough and contribute to its rise. Of all the existing yeast types, we recommend using beer-based dry yeast. They are usually sold in sachets and do not need to be soaked in water first. There is also "fast acting" or "bread baking yeast". They are a "stronger" yeast that rises 50% faster than normal yeast. Use them only if you have selected the "FAST BAKE" setting. Yeast in pyectics is very sensitive to moisture, so it is not recommended to store them after opening for more than a day. Alternatively, you can use fresh pressed brewer's yeast in briquettes: 1 g of dry brewer's yeast corresponds to 3.5 g of fresh brewer's yeast.
Liquid IngredientsLiquid ingredients are generally considered to be water or milk, or a mixture of both. The water makes the crust crispier. Milk makes it softer and more delicate. There are different opinions about what temperature the water should be. You can choose the desired temperature yourself as you get comfortable with the device. Water is the second most important ingredient in bread baking. In general, the most suitable water temperature should be between 20 ° C and 25 ° C. But in the case of the super fast bread baking option, the water temperature should be varied between 45 ° C and 50 ° C to speed up the process. It is very important that the water is of good quality and is better bottled, as lime in the tap water can interfere with a good bread baking result. Instead of water, you can also use fresh milk or water with 2% fat milk powder, which gives a pleasant taste and improves the color of the crust. Some recipes even mention fruit juice. Low fat contentDo not use low fat oils, margarine, or similar products. Such products contain little fat, while the recipe provides for more fat, so there is a risk of not getting the desired result. SugarSugar activates and nourishes the yeast, making it swell. Adds flavor and texture, and promotes the formation of a golden brown crust. Instead of sugar, you can use honey, syrup and molasses, remembering to take into account their amount in the sum of all added liquid ingredients. Artificial sweeteners are not recommended as they not only do not nourish the yeast, but some even destroy it. SaltSalt helps regulate the rise of the yeast. Without salt, the bread can rise too much and then fall off quickly. It also adds flavor. EggEggs give your bread a richer and more nutritious flavor, beautiful color, shape and texture. Eggs fall under the liquid ingredients category, so measure other liquid ingredients carefully if using eggs already. Otherwise, the dough may become too runny and will not rise as it should. Herbs and spicesThey can be added right at the start along with the other main ingredients. Herbs and spices such as cinnamon, ginger, origano, parsley and basil add flavor and delight to your eyes. They should be added in small quantities (1-2 tablespoons) so that they do not overlap the taste of the bread itself. Fresh herbs like garlic and chives contain enough liquid to break the recipe dosage, so be careful about the liquid content of the dough. Additional ingredientsAdditional ingredients can only be added when starting those programs where they are provided. Dried fruits and nuts should be cut into small pieces, cheese should be grated, and chocolate should be crushed into small pieces, not lumps. It is not recommended to add more ingredients than is indicated in the recipe, otherwise the bread will not rise as it should. Be careful with fresh fruits and nuts as they contain liquid (juice and oil). Therefore, they must be taken into account when calculating the amount of the main liquid ingredients. Programs- Vegetable oil can be replaced with melted butter. - Follow the order of adding ingredients from the corresponding table. - All recipes allow for the option of replacing high-gluten flour with gluten-free flour, as well as selecting other ingredients for people with gluten intolerance. Cleaning and maintenanceAttention! It is not recommended to immerse the device body, plug and wire in water or other liquids; use a damp cloth to care for the device. Even when the appliance is not switched on, it is necessary to unplug the plug from the socket before inserting or removing individual parts or for cleaning. Let the appliance cool down and then start cleaning it. It is not recommended to use metal tools to remove bread from the mold (L), as this will damage the non-stick coating. 1) Cleaning of the mold is carried out with wiping movements using a damp cloth. 2) If the stirring paddle (I) cannot be removed from the motor shaft, pour as much hot water as possible into the mold and let it soak for 30 minutes. Then gently wipe off the stirring paddle with a damp cloth. 3) Wash the measuring cup (M), measuring spoon (N) with warm water and soap. 4) Wipe all other surfaces of the appliance, outside and inside, with a damp cloth. If necessary, use liquid detergent, remembering to rinse everything thoroughly after using it, otherwise the detergent residues may affect the quality of your baked goods.
|
|||||||||||||||||


| Ariete 133. Description and characteristics of the bread maker | Technical characteristics of the Ariete 131 bread machine |
|---|
New recipes