|
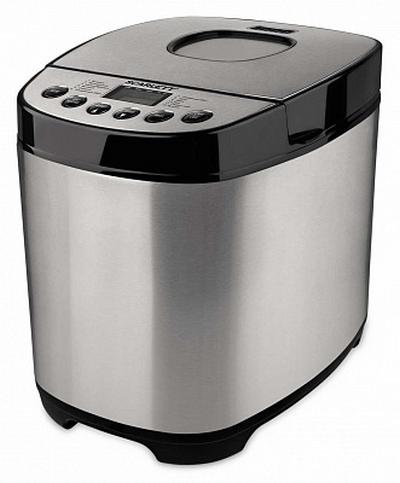
Scarlett SC-BM40003 Specifications
Power, W: 600
Number of programs: 12
Body material: Steel
Recipe book: Yes
Accessories included: 1) Kneading paddle 2) Beaker 3) Measuring spoon
Features of the model: 1) Compact size, light weight
Color: Steel
Panel in Russian: Yes
Loaf size, g: 500/950
Choice of crust color: 3
Delay bake function: Yes
Gluten Free Bread Program: No
Accelerated Mode: Yes
Jam / Jam Mode: Yes
Dough preparation function: Yes
Automatic temperature maintenance: Yes
Cool-touch casing: Yes
Removable non-stick bowl: Yes
Buzzer: Yes
LCD: Yes
Viewing window: Yes
Time to save the program in the event of a power outage, min: 15
Maintaining the temperature after the end of the program, min: 60
Delaying the start of the program, hours: 13
Color: Steel
THE ADVANTAGES OF YOUR BAKERY
• The bread maker is equipped with an automatic bread making mode.
• You can choose from 12 different baking programs.
• You can use ready-made baking mixes.
• The bread maker allows you to cook jams and cereals.
• You can knead the dough for making noodles and other dishes.
INSTALLATION
• Make sure there are no packing materials or foreign objects inside the Bread Maker.
• Check for any damage in transit:
• cover;
• body and observation window;
• chamber walls;
• removable bowl.
• If any defects are found, do not turn on the oven; contact the service center.
• Place the device on a dry, level and heat-resistant surface.
• Do not install the device near combustible materials, explosives and self-igniting gases.
• Do not place the appliance next to a gas or electric stove or other heat source.
• Do not put anything on the oven. Do not block ventilation openings.
• The bread machine should not be placed in a cupboard. For normal operation of the oven, it is necessary to provide free space for ventilation: at least 20 cm from the top, 10 cm from the back panel and at least 5 cm from the sides.
• Before using for the first time, wipe the removable bowl, kneading spatula, inside and outside of the bread maker with a clean damp cloth. Remove the protective film from the control panel.
JOB
• Connect the breadmaker to the power supply.
• Place the bowl of food in the oven (according to the recipe) and close the lid.
MENU BUTTON
• This function allows you to select the desired cooking program.
• Load the desired baking program. The program number and the corresponding baking time will appear on the LCD.
• Attention: a beep should be heard when pressing the buttons.
BAKING PROGRAMS
• Press the “MENU” button to select the desired program.
Baking program 1. Basic
• This mode is used for preparing white or mixed breads. For the preparation of bread, rye or wheat flour or ready-made mixtures are used. The loaf is light and dense (see the table at the end of the instructions).
Baking program 2. French
• This mode is used for light, light, crispy bread made from wheat flour. The loaf is light and airy, like a French baguette (see the table at the end of the instructions).
Baking program 3. Whole grain
• This mode is used to bake bread with sprouted or rolled grain mixtures.The bread is dense, the crust is firm, not crispy (see the table at the end of the instructions).
Baking program 4. Fast
• This mode is used to bake bread with soda or yeast. The loaf is light but dense. With this mode you will prepare basic white bread using rye flour or bread using special starter cultures (see the table at the end of the instructions).
Baking program 5. Sweet
• This mode is used to bake bread with various sweet ingredients such as fruit juices, grated nuts, dried fruit, chocolate or sugar. In this mode, the time for raising the bread is increased, as a result of which the bread is light and airy. With this mode you will prepare marmalade cake, tea bread, Caribbean bread (see the table at the end of the instructions).
Baking program 6/7. Accelerated 500g / Accelerated 950g
• This mode is used for preparing bread from ready-mixed mixtures. In this mode, the processes of kneading, raising and baking the dough are significantly reduced and do not take much time. As a result, the bread is the roughest of the 12 suggested modes (see the table at the end of the instructions).
Baking program 8. Dough
• This mode is used to prepare yeast-free dough. In this mode, only the dough is kneaded without further baking. With this program you can make dough for pizza, dumplings, pasties, Italian pasta and homemade noodles (see table at the end of the instructions).
Baking program 9. Jam
• This mode is used to prepare all types of jams and preserves from fruits, vegetables and berries (see the table at the end of the instructions).
Baking program 10. Cupcake
• This mode is used for preparing muffins and pastries from ready-mixed mixtures (see the table at the end of the instructions).
Baking program 11 Sandwich
• This mode is used for making sandwich bread, it remains soft for a long time (see the table at the end of the instructions).
Cooking program 12. Baking
• This mode bakes for 60 minutes, does not include kneading and raising, or tinting the dough (see the table at the end of the instructions).
BUTTON "BROWN COLOR"
• The crust color function allows you to program the baking of light, medium or dark crust.
• Press the CRUST COLOR button once, twice or three times for light, medium or dark crust respectively. An arrow-marker will appear on the LCD, which will indicate the selected crust color.
BUTTON "MASS"
• This function allows you to set the weight of the baked loaf. A small loaf weighs 500 grams, a large loaf weighs 950 grams.
• Press the MASS button once or twice for small or large loaf respectively.
• A marker arrow will appear on the LCD to indicate the size of the loaf to be selected.
• WARNING: By default, the bake oven is set to bake a large loaf.
START / STOP BUTTON
• To start / stop the operation of the bread maker or reset the selected function, press the START / STOP button.
• To start the program, keep the button pressed for 1 second until you hear a beep.
• To end an operation or delete parameters, keep the button pressed for 2 seconds until a long beep is heard.
• ATTENTION: Do not press the START / STOP button if you want to check the baking state. Use the window on the lid of the bread machine to check pastries.
PROGRAM NUMBER
• The program number is displayed on the LCD in the upper left corner.
MEMORY FUNCTION
• In the event of a power failure for no more than 10 minutes, the bread maker will resume the selected program from the moment of the power failure.
TIMER
• The timer function allows you to postpone the baking time.
• The maximum grace period is 13 hours.
• For example: the current time is 20:30, you want the bread to be ready by 7:00, ie.after 10 hours and 30 minutes. Press the "MENU" button, select the mode, select the crust color and the size of the loaf, then press the "TIME +" button to add the time up to 10 hours 30 minutes. The time will be displayed on the LCD. Then press the START / STOP button to activate the timer. The time counts down on the display.
• WARNING: We do not recommend using the timer function when using quickly perishable ingredients such as eggs, milk, cream and cheese.
USEFUL TIPS
• You must first remove the removable bowl, put the necessary ingredients in it, and only then place the bowl in the oven.
• Always follow the order of adding ingredients. Pour the liquids first, then add butter, sugar, salt, then flour and other additives, at the very end of the yeast.
• All ingredients should be at room temperature to maintain optimal yeast growth.
• Measure the amount of ingredients accurately. Even a slight deviation from the value specified in the recipe can affect the baking result.
• During operation, do not open the lid of the bread machine and do not pull out the bread pan.
• The lid can only be opened to add the necessary ingredients to the dough strictly at the beeper signal.
• Opening the lid at any other time will lead to a temperature violation in the bakery and may affect the quality of the bread baking.
OPERATING PROCEDURE
• Remove the removable bowl.
• Press down on the kneading spatula, check that it works.
• Place ingredients in a bowl.
• CAUTION: Make sure the yeast does not come into contact with salt and liquid.
• Place the removable bowl back into the bread maker.
• Make sure to position the bowl correctly.
• Close the instrument cover.
• Connect the device to the mains. An audible signal will sound and the display will show the program number and duration.
• Press the "MENU" button and select the program number.
• Choose the crust color and size of the loaf.
• Now you can adjust the cooking time using the timer.
• Press the START / STOP button to start the program.
• At the end of the operation, a beep will sound and the display will show the time 0:00.
• Let the bread steep a little.
• Disconnect the appliance from the power supply before opening the cover.
• Remove the bowl with an oven mitt or mitten.
• Turn the bowl over and shake slightly. If the bread does not slip, you can use wooden or plastic spatulas to remove the bread from the bowl. Do not use metal objects, they can scratch the surface of the bowl!
• Let the bread cool for 30 minutes, then you can cut it.
• CAUTION: Make sure that the kneading spatula is not left in the bread. If this happens, carefully remove it from the bread. Do not use metal objects, they can scratch the surface of the spatula!
CLEANING AND MAINTENANCE
• The oven should be cleaned regularly and any food debris removed from its surface.
• Switch off the oven and unplug it before cleaning.
• Let the oven cool completely.
• Wipe the control panel, external and internal surfaces, removable bowl with a damp cloth and detergent.
• Do not use aggressive substances or abrasive materials.
STORAGE
• Make sure that the oven is unplugged and completely cooled down.
• Fulfill all the requirements of the section “CLEANING AND CARE”.
• Store the oven with the lid ajar in a clean, dry place.
PROBLEMS AND WAYS OF THEIR ELIMINATION
The bread does not rise
The quality of the gluten in your flour is not suitable, or you are not using bread flour. (The quality of gluten may vary depending on temperature, humidity, flour storage conditions, and harvest time)
Try a different type of flour, from a different manufacturer, or a different batch of flour.
The dough became too hard because you added too little liquid.
Protein-rich bakery flours absorb more water than others, so try adding an extra 10-20 ml of water.
You are using the wrong yeast.
Use dry yeast from bags labeled “fast acting yeast”. This type does not require pre-fermentation.
You put in little yeast, or your yeast is old.
Use the supplied measuring spoon. Check the expiration date of the yeast. (Store them in the refrigerator)
The yeast got liquid before mixing.
Make sure you put the ingredients in the correct order according to the instructions.
You have added too much salt or not enough sugar.
Check the recipe and measure out the correct amount with the included measuring spoon.
Check that salt and sugar are not included in other ingredients.
Loose bread
You have used an excessive amount of yeast.
Check the recipe and measure out the correct amount with the included measuring spoon.
You have added too much liquid.
Some flours will absorb more water than others, try reducing the amount of water by 10-20 ml
The bread fell through after rising
The quality of your flour is not satisfactory. Try another manufacturer's flour.
You have used too much liquid. Try to reduce the amount of water by 10-20 ml.
The bread has risen too much
You are using an excessive amount of yeast / water.
Check the recipe and measure out the correct amount with the supplied measuring spoon (yeast) / cup (water).
Make sure no excess water comes from other ingredients.
You don't have enough flour.
Weigh the flour gently with a scale.
The bread is pale and sticky
You are not using enough yeast, or your yeast is old. Use the supplied measuring spoon. Check the expiration date of the yeast. (Store them in the refrigerator)
There was a power failure or the machine stopped while baking bread.
The machine turns off if it is stopped for more than ten minutes. You need to remove the bread from the mold and start the cycle again with new ingredients.
There is flour on the bread
You have used too much flour or you are low on liquid.
Check the recipe and measure out the correct amount of flour using the scale or liquid with the supplied liquid measuring cup.
The dough is not mixed well
You did not insert the kneading spatula into the bread pan.
Make sure the spatula is in shape before loading the ingredients. There was a power outage or the machine stopped while baking bread.
The machine turns off if it is stopped for more than ten minutes.
Apparently, you will need to start baking the bread again, however, this can be negative if kneading has already started.
|